It’s was love at first taste. Hot chili oil is my soul-food-mate. We first met a mile up on a mountain après-ski. And by après-ski, I mean after tumbling down beautiful mountains while being videoed (and pointed and laughed at) by the nimble, GoPro wearing 13-year-old cousin of Cyrus. (Please let those videos never surface.)
Love of hot chili oil
While enjoying an amazing brick oven, truffle-topped pizza, we saw a waiter carrying around a glorious giant glowing bottle of hot chili oil. Cyrus and I both love hot chili oil and…well, anything spicy… so I gave him a kick under the table and a head-nod (you know, the original 1-2) to retrieve this ruby red gem. Shortly, thereafter, everyone at our 8-person table was dribbling this hot chili oil (some more liberally than others) on their food. It was love.
When we got back home, I was determined to recreate this illustrious hot chili oil. It has taken A LOT of trial and error, and a lot of olive oil, but I finally got this nectar down pat. It’s quite simple actually, and I’ve figured out a few tricks along the way to make this as mess-free as possible. Now, it’s my go-to gift for friends, who I know share my love for spicy goodness.
Taste
It’s spicy, slightly smoky, aromatic, and full of flavor that lingers on your tongue for just the right amount of time… and it is one thing in our kitchen that we try to never let run out. It’s perfect on top of crackers, paired with cheese, added to sauces, with grilled veggies and meats… friends who I’ve given it too say they’ve also used it on top of crispy kale, scrabbled eggs, steak and cheese sandwiches, salad dressings, and the list goes on!
Ingredients you need
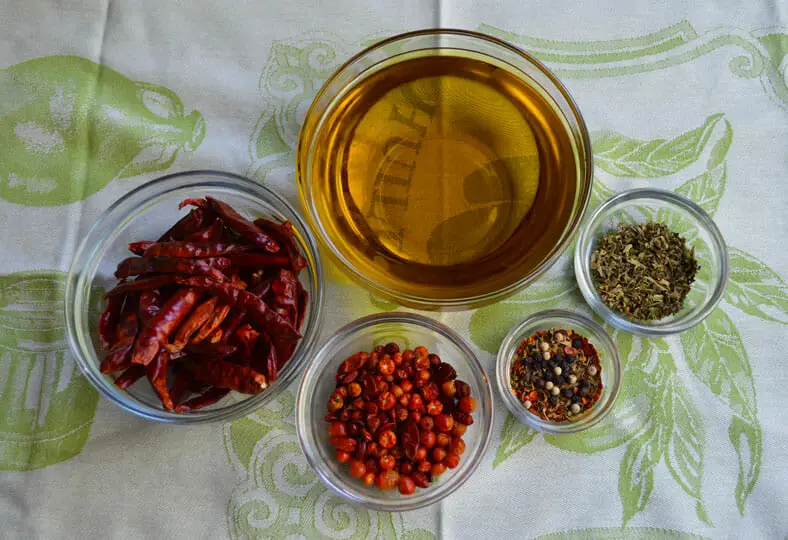
So, let’s get down to it… all you need to make hot chili oil at home is some olive oil, dried herbs, dried chili peppers and a food processor (on Amazon)….and a thermometer would be helpful if you have one handy. Use a mix of whatever dried chili peppers you can find at the market or local grocery story amounting to just over a cup, add some oregano, thyme, paprika, peppercorns, and the secret (or not-so-secret any more) ingredient is dried fenugreek leaves. The aroma of fenugreek is quite unique and it’s an earthy, slightly smokey flavor with a very warm aromatic quality reminiscent of maple, plus this ingredient is known to have remarkable medicinal values.
Throw the dried chili peppers and herbs in the a food processor (on Amazon) until the mixture is very well ground but it still has a crushed, seedy texture. Once that’s done, you just heat up the oil in a sauce pan over low-medium heat for a minute or two and then pour all the dried ingredients into the oil. Stir gently.
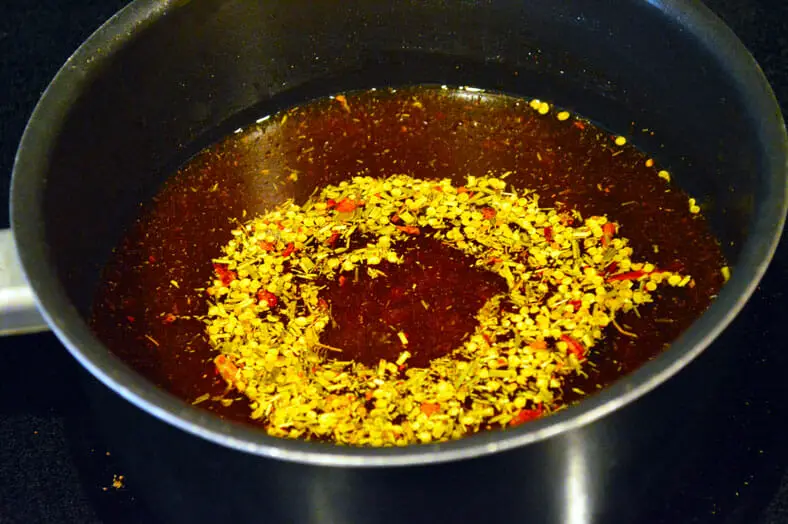
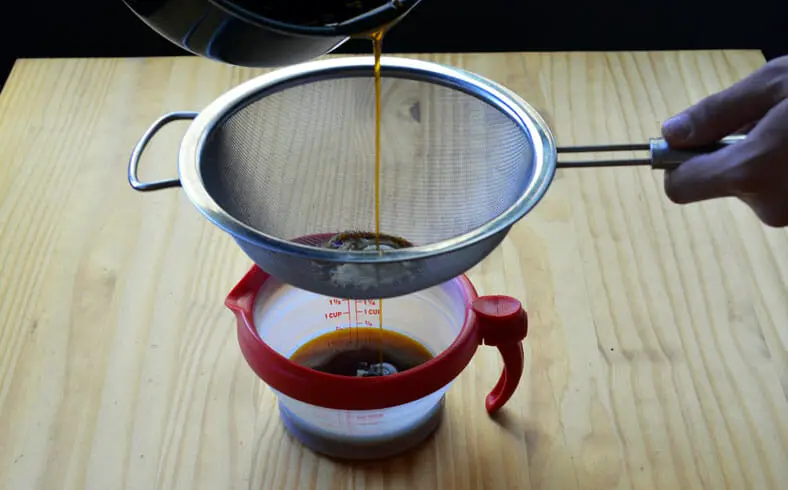
Be careful not to let the oil simmer, there will be a few bubbles, but you want to cook slowly to extract all the delicious flavors into the oil. If it starts to simmer, remove oil from the heat until the simmer seizes and the stove top cools a bit, then re-apply low heat. You can regulate how spicy you want this oil by letting the heat of the oil rise a bit higher and by letting the oil sit on low heat for longer. I like it hot, so I’m looking for the oil to hit about 200 degrees F and let it stay there for about 15 – 20 minutes, stirring the oil every few minutes and making sure the herbs aren’t sticking to the bottom of the pan (trust me, burnt chili flakes in your oil isn’t tasty!). Once the oil starts heating up, it’s quite hard to control the temperature from rising, so once the oil hits 200 degrees I find it best to turn down the stove top a click or two. The temperature of the oil will continue to rise to about 230-250 degrees, over the 15 – 20 minute timeframe. If you want a more mild flavor, look for the oil to hit about 180 degrees F and let it stay there for about 5 – 10 minutes. Again, once the oil registers at about 180 degrees, you’ll want to turn the stove top down a click or two to control the temperature from rising too much more. The best (and yummiest) way to figure out how you want your hot chili oil is to taste along the way! Once the time is up, turn off the heat and let the oil cool to room temperature, about 2 hours. Once the oil has cooled, you’re almost there! Just pour the oil through a mesh sieve, separating the oil from the chili flakes.
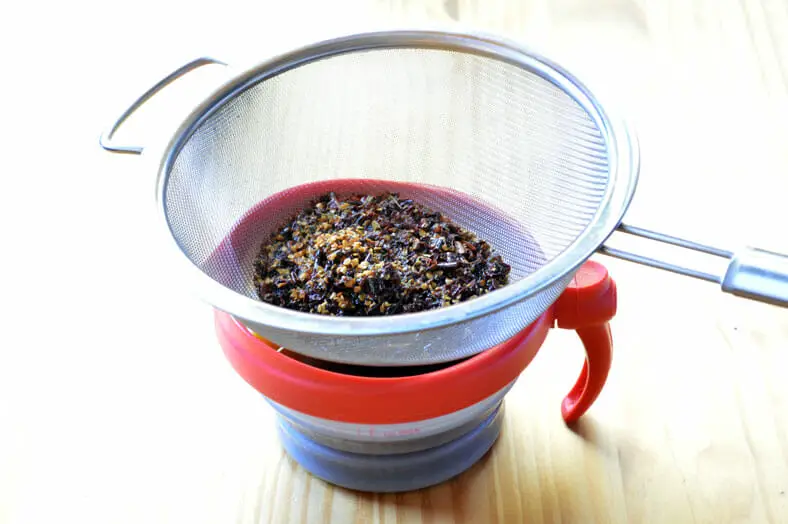
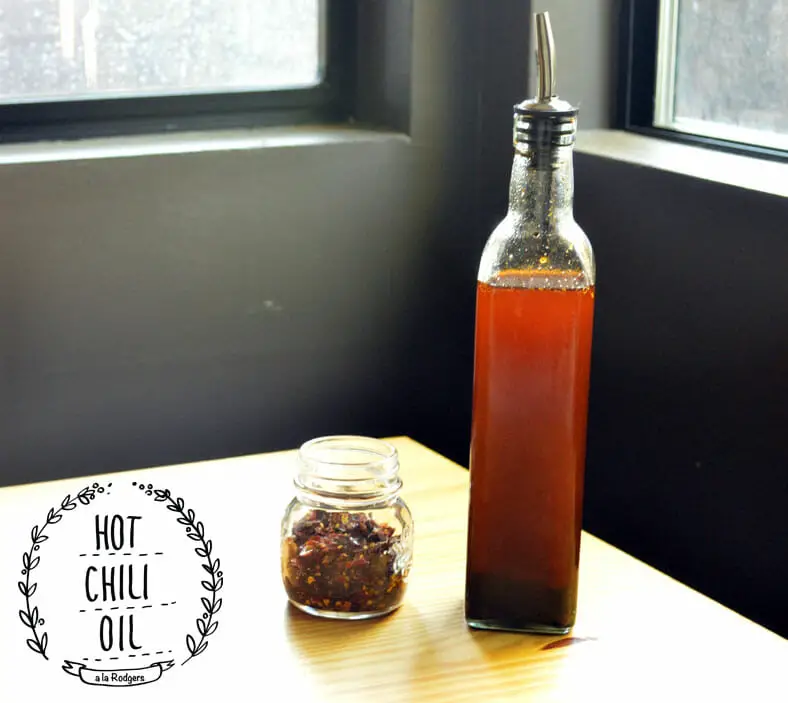
Scoop some of the chili flakes from the sieve into the bottom of the glass container where you will be keeping this chili oil and then pour the beautiful red hot chili oil on top. I’ve found if you put all the excess pepper flakes into the oil container, the oil pourer gets clogged. Instead, I like to put these chili pepper flakes in a separate jar and use small spoonfuls of this rich oil-soaked chili pepper concentrate to add some heat to sauces or sautés. One more thing I love about this hot chili oil is that the flavor continues to develop over time, so I love making this oil before I’m about to go on a trip because I know when I get back it’s going to be even better than when I left!
Print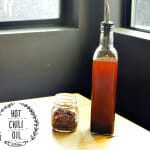
Hot Chili Oil a la Rodgers
- Total Time: 20 minutes
- Yield: 32 servings 1x
Description
Hot Chili Oil a la Rodgers with whole dry chili peppers and whole peppercorns.
Ingredients
- 2 cups olive oil
- 1 cup of whole dry chili peppers (stems removed)
- 2 tbs chili pequin
- 2 tbs chili tepin
- 2 tbs dried fenugreek leaves (also commonly referred to as Kasuri Methi – available in Indian, Pakistani or Persian grocery stores or on Amazon)
- 1 tsp oregano
- 1 tsp thyme
- 1 tsp paprika
- 1 pinch of whole peppercorns
Instructions
- Pour the oil in a medium-size sauce dish on low-medium heat.
- Throw all ingredients in the food processor (on Amazon) and blend until very well grounded
- Pour blended ingredients from food processor into the pre-heated oil, stir gently and let it rest
- Look for oil to register at about 200 degrees F on a thermometer, once it hits 200 degrees turn down the stove heat one click, and let it stay there for about 15 minutes (see note below if you want your chili oil to have a more mild heat)
- Remove from heat. Cool to room temperature, about 2 hours
- Pour the oil through a mesh sieve, separating the oil from the chili flakes
- Scoop some of the chili flakes into the bottom of the glass oil container and then pour chili oil on top
- Put the rest of the chili flakes in separate glass container and seal
Notes
If you want a more mild flavor, look for the oil to hit about 180 degrees F and let it stay there for about 5-10 minutes. The best (and yummiest) way to figure out how you want your chili oil is to taste along the way!
Don’t add fresh herbs or garlic unless you plan to use all the oil right away. When infusing garlic with oil, and leaving it out at room temperature, bacteria spores can grown that cause botulism. Best bet is to avoid infusing oils with fresh garlic.
- Prep Time: 5 mins
- Cook Time: 15 mins
- Category: Condiment

This oil looks wonderful! I don’t use a lot of oil so I’m wondering if I could flavor plain vinegar in the same manor. Thanks for the idea! I love the clean look of your blog and look forward to what you guys have in store!
Thanks Juliana! I’m sure you could do the same thing with vinegar instead of oil. If you do give it a try, let us know how it turns out! We’d love to see the results of a spicy vinegar as well
And many thanks for the compliments on the blog.. there’s more to come 🙂