Learning the story behind famous dishes never gets old, especially when it’s one that you’ve already encountered several times before.
To say that we’ve encountered bibimbap only several times would be a slight understatement, but we’d still never really known much about it until recently.
Now that we have, though, we’re that much more appreciative of such a lovely, diverse dish.

The Origins of Bibimbap
For a dish as popular in the Korean cuisine as it is, the origin of the contemporary version of the dish has a surprisingly agreed-upon source: the Siui jeonseo.
Written in the latter parts of the 19th century, the Siui jeonseo was a cookbook intended for the Korean nobility that very thoroughly examines elements of Korean cuisine (including making traditional alcoholic beverages, of course) and outlines different cooking methods for traditional foods. The true author of the Siui jeonso remains anonymous and a true mystery, but there are suspicions that they might have belonged to the nobility from the northern parts of what is now the modern day Gyeongbuk province.
It is in the Siui jeonso where bibimbap makes its first official appearance. Referred to as bubuimbap in the book, the premise for the recipe derived from the idea of bibida, the Korean word for mixing. The contemporary bibimbap variation of the name refers to the same bibida principle.
However, as with pretty much any other dish we’ve explored, there are differing theories as to how bibimbap really originated. In some cases, it isn’t even called bibimbap at all! References to a dish called goldongban illustrate a dish of “mixed disorderliness” in a single bowl eerily similar to that of bibimbap.
To be fair, though, each “bibimbap theory” does sound entirely plausible.
You May Also Like…
If you love rice dishes, you should also check out our other Peruvian fried rice with a Cantonese flair, or a Jordanian rice pilaf with lamb and yogurt sauce (mansaf with jameed).
Feel like eating your rice plain? Try our Korean Bibambap vegan with tofu and vegetables, or Korean Beef Bulgogi served with white rice.
Love chicken thighs? Try our saffron rice with marinated chicken thighs.
The Varying Other Theories of Bibimbap
First, there’s the theory that bibimbap is quite literally a meal fit for a king. During the Joseon dynasty, a regular meal for the king was called a sura. When the king’s relatives would come in to visit, however, a lighter meal called bibim would be served for the king and his guests. In this case, bibimbap is a derivation from this bibim concept.
Another theory comes from the other side of the socioeconomic spectrum. During the farming season, peasants couldn’t have regularly timed meals while spending their days in the rice fields, so they would compile their day’s worth of food and nutrients into one bowl.. a principle eerily similar to what the Egyptians did with their koshary.
Next, there’s a theory involving the Donghak Peasant Revolution of 1894-95. Korean society at this particular point in history was particularly unstable with multiple peasant-fueled revolutions against the aristocracy, but one of the most successful campaigns came in the Gobu province. While rebelling against the morbidly corrupt magistrate of Gobu, the peasants would mix together their ingredients and rice into a single bowl in the face of limited supplies.
Finally, there’s one last suggestion that the concept behind bibimbap originates from the jesa, or a traditional Korean ceremony performed as a memorial to the ancestors of the participants. Each jesa will have a set of sequential rituals to perform, but it’s in the final ritual – the eumbok – where the participants partake in a celebratory meal together of different offerings mixed together in a single bowl.
Whew! Those are a lot of theories!
About the Recipe
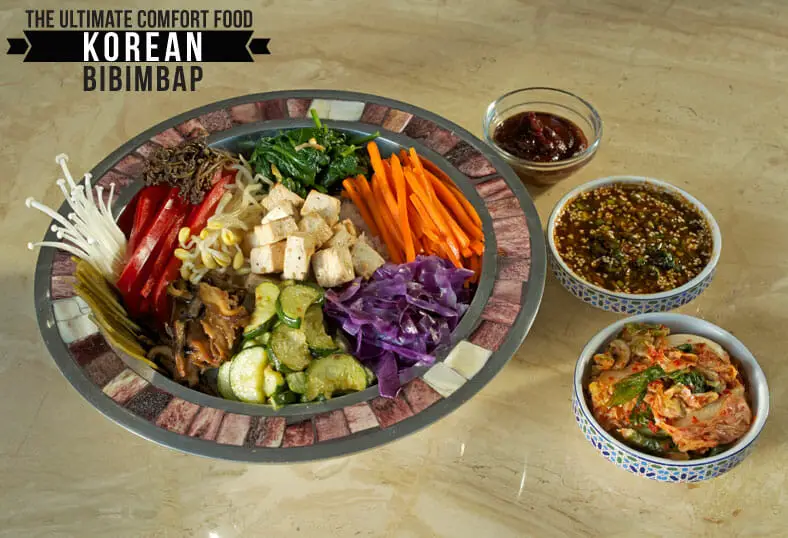
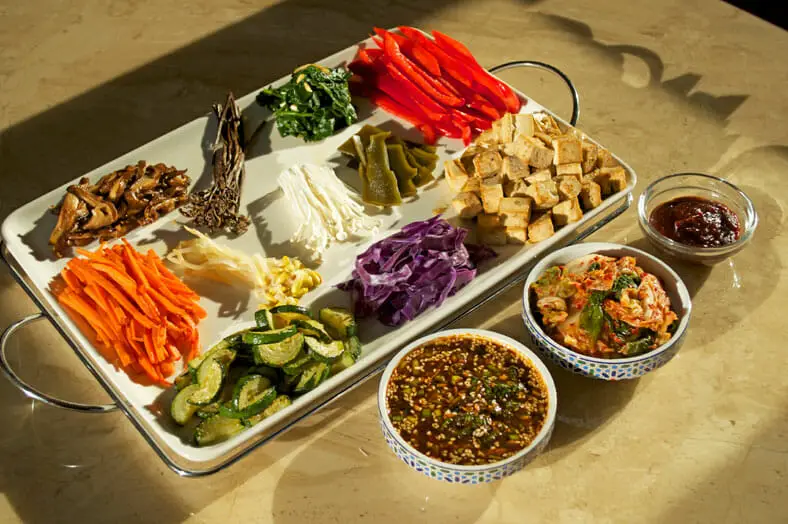
Regardless of where the true origins of bibimbap, the main principle is – you guessed it – to mix plenty of different ingredients of varying colors, tastes, shapes and textures into one bowl.
From there, it’s truly up to the creator of the bibimbap what they intend to do with the dish. Different regions have completely different renowned versions of bibimbap from one another even. For example, the bibimbap you’d find in the city of Jeonju is very heavy on the bean sprouts and considered usually very spicy, whereas the kind from the city of Tongyeong is completely non-spicy, highly vegetable-based and vegan-friendly. The bibimbap from Andong, on the other hand, is very heavy on the beef in its version.
One particular ingredient that is very often in bibimbap of all shapes and sizes, however, is steamed rice.
The Special Way for Preparing Bibimbap’s Steamed Rice
The key to a good bibimbap (at least as we currently know it) is to really nail and have a true sticky rice leading the charge. To do this, you need to essentially bring your rice along a “journey” wherein it first boils then simmers then steams within itself.
During this three-stage process, the rice gelatinizes and becomes more resilient and sticky in texture. One of the best ways we can recommend to ensure your chances of success in this area is to pre-soak the rice for at least one hour prior to cooking.
Our Take on the Recipe
While the recipe below might seem daunting, preparing bibimbap can actually be very easily done in a short period of time. Basing our version off of a great original reference recipe, we did make a few changes to our ingredients and to our own process that yielded a bibimbap that was distinctively ours.
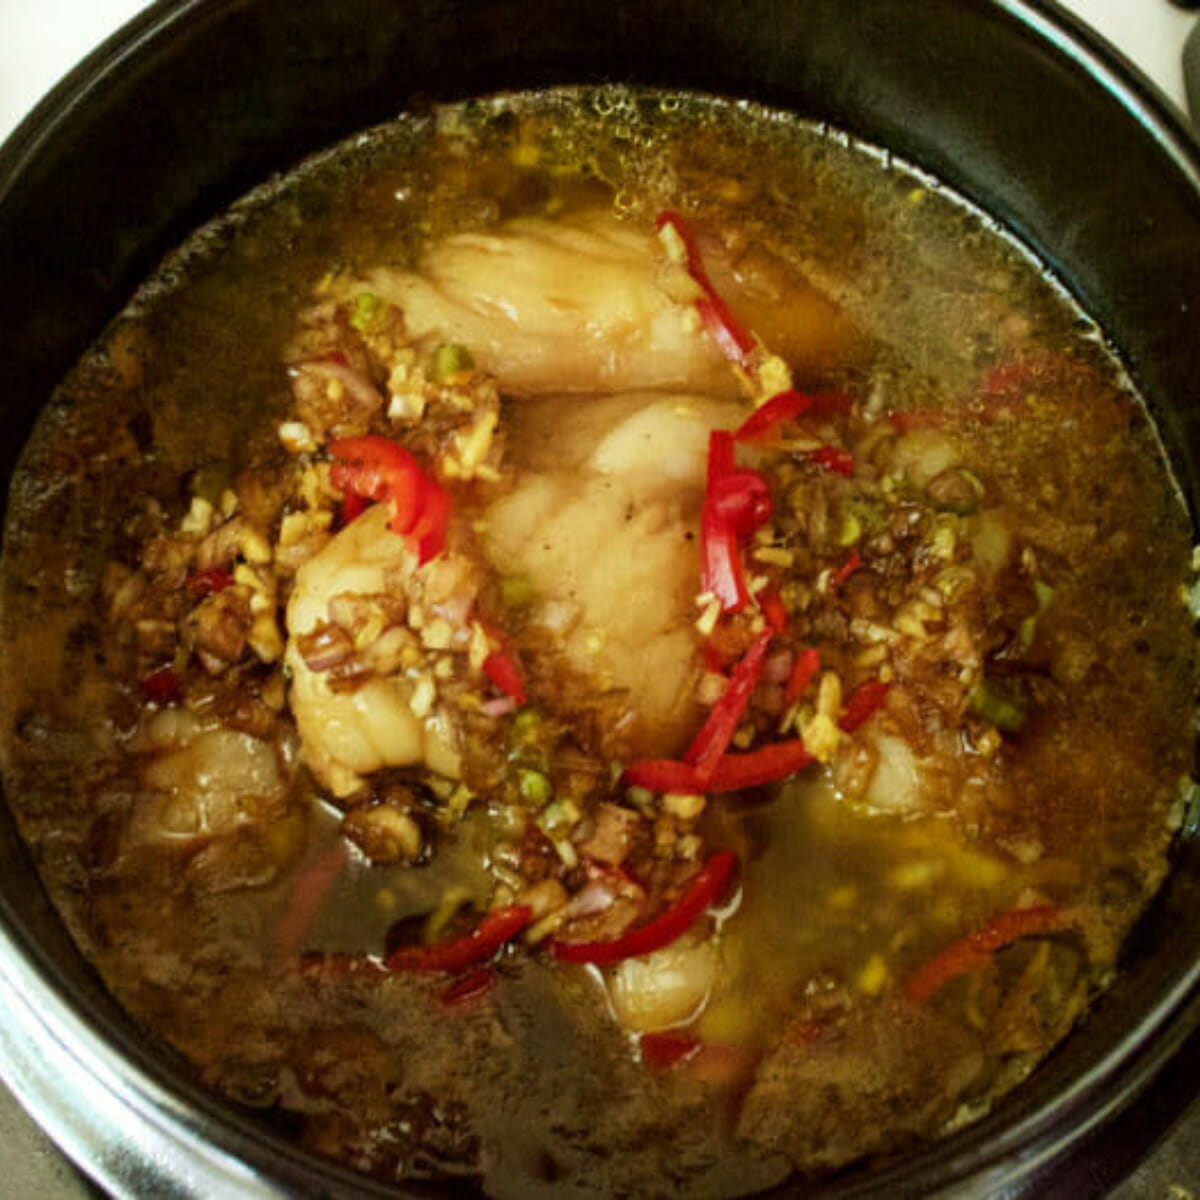
First, we opted to make our final bibimbap in more the Tongyeong fashion that was more suitable to the vegan diet. This wasn’t an overtly intentional change, but it did naturally fall into place throughout our own recipe development process. For what it’s worth, though, Cyrus did make some slow cooked beef for one batch we made and had rave reviews about it as well. If you prefer having meat or eggs in your bibimbap, definitely go ahead and do it… that’s the true beauty of the dish.
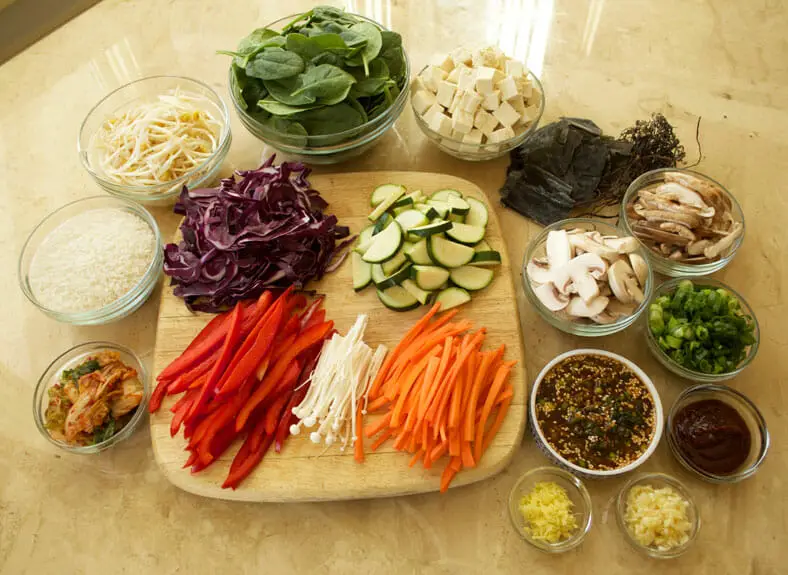
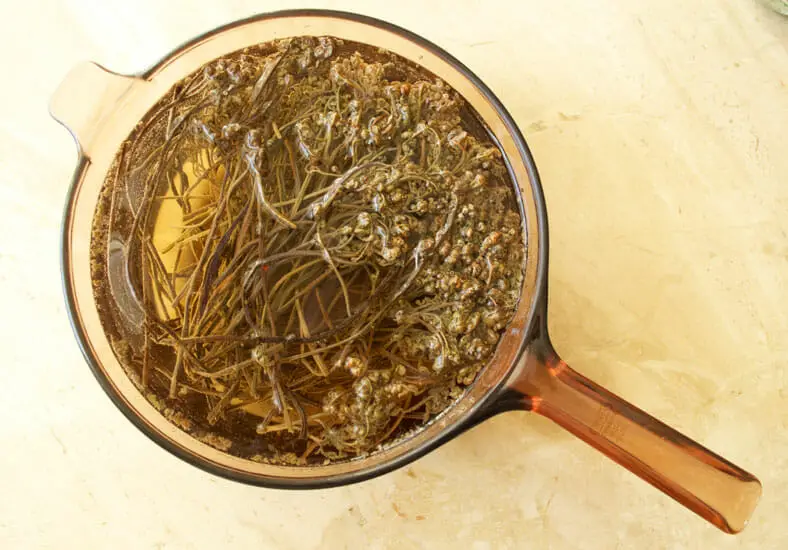
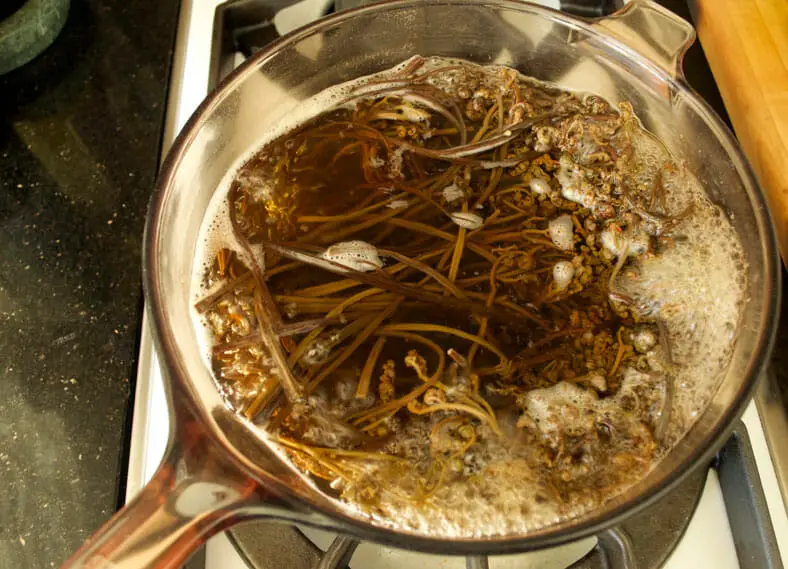
Thankfully, we have a really fantastic Korean market near us here in Washington, DC, and so we were able to find great Korean ingredients to add to our bibimbap. In particular, we really enjoyed adding both kosari and dashima to our recipe. Kosari is an edible Korean wild mountain green famous for its high protein content, and dashima – also referred to commonly as kombu in other cuisines – is a kelp or sea tangle that is fantastically high in minerals and nutrients.
If you do opt to add kosari to your own bibimbap, please do yourself a favor and get it pre-soaked and cooked. Using dried kosari is a bit of a pain, since you’ll have to soak it in cold water for 20 minutes then boil it for another 30 then soak it for at least 6 more hours before it’s cookable and edible. It’s far more convenient to get it essentially ready-made.
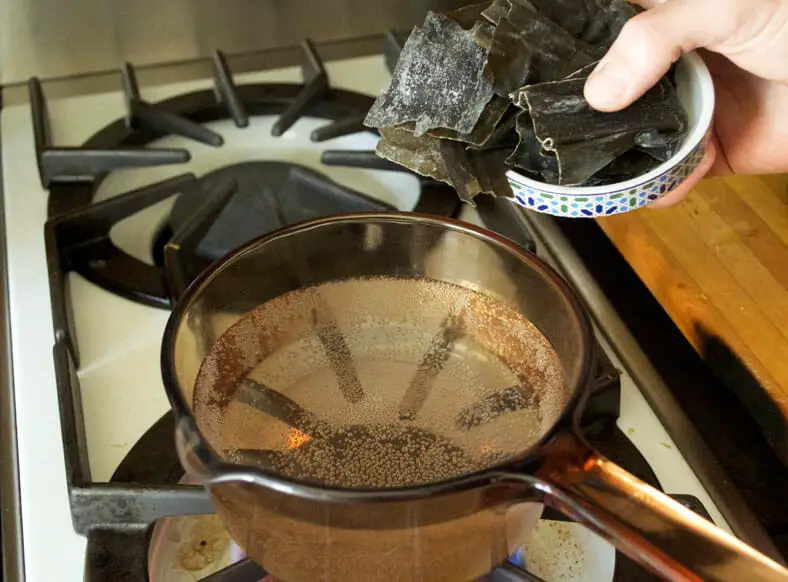
Dashima, on the other hand, is slightly easier to use and can be easily soaked or boiled quickly within 10 minutes for eating.
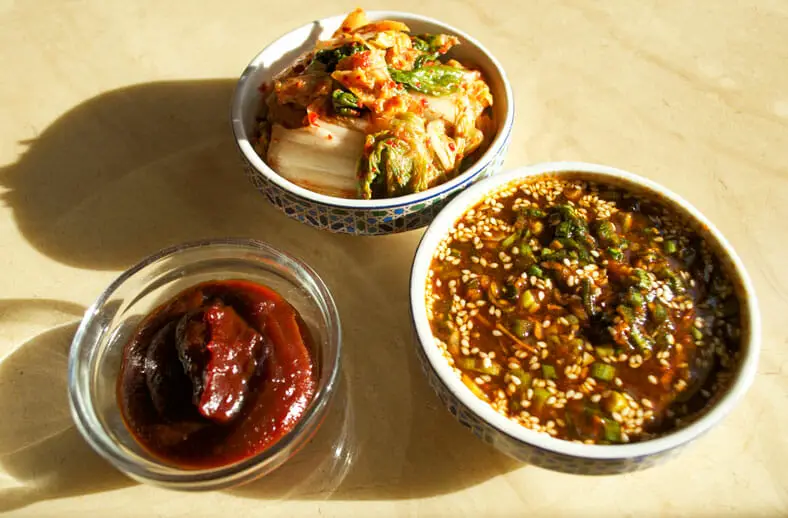
Other than that, the last few words of wisdom we can impart to you are certainly to make the yangyeomnjang sauce! We opted to use gochujang (on Amazon), a sauce of chili peppers and fermented soybeans, instead of gochugaru, a cayenne-like chili powder, in our version that gave a tangier and (we think) spicier flavor to it, but it’s certainly one sauce that’s an absolute must to have! And kimchi is also a fantastic accompaniment.
All in all, though, bibimbap is a fantastic dish that is absolutely loaded with nutrients and exciting variety. It will certainly be one that goes in the record books as a go-to for fun dinners with friends and family!
What do you put in your bibimbap? Comment below!
Love Asian Food? Try one of these other recipes:

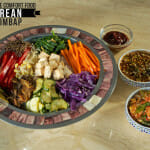
Bibimbap – Vegan with Tofu and Veggies
- Total Time: 1 hour 20 minutes
- Yield: 4 people 1x
Description
Bibimbap with carrots and spinach leaves.
Ingredients
Rice
- 2 cups short grain rice
- 3 cups water
“Topping” Ingredients (All optional.. add and subtract as you like)
- 2 cups raw bean sprouts
- 1 cup of spinach leaves
- ½ cup red cabbage, chopped
- 3 cloves of garlic, minced
- 1 zucchinis, halved and sliced
- 2 medium sized carrots, cut into matchsticks
- 1 red bell pepper, julienned
- ½ cup kosari (Korean edible wild greens), ideally pre-soaked and pre-boiled
- ½ cup dried dashima (Korean sea tangle)
- ½ cup shiitake mushrooms, stemmed and sliced thinly
- ½ cup enoki mushrooms
- ½ pound of tofu, cubed
- 5 tablespoons olive oil
- 1 teaspoon salt
For Flavorings of Toppings (Based on the toppings above)
- 3 tablespoons soy sauce
- 4½ teaspoons sesame oil
- 2 teaspoons black pepper
- 1 tablespoons olive oil
- 3 tablespoons of rice vinegar
- 2 teaspoons coconut sugar
- 3 tablespoons water
- 4 cloves garlic, minced
- 1 inch knob of ginger, minced
Sauces and Garnishes for Bibimbap Overall
- ½ cup kimchi
- 2 handfuls of fresh mint
- 2 handfuls of fresh basil
- 1 cup of yangnyeomjang (recipe below)
- ¼ cup of gochujang (on Amazon)
- 4 cloves raw garlic, minced
- 3 tablespoons sesame seeds
Yangnyeomjang Sauce
- 5 tablespoons soy sauce
- 2 tablespoons toasted sesame oil
- 1 teaspoon rice vinegar
- 2 teaspoons gochujang (on Amazon) (a Korean sauce of chili pepper and fermented soy beans)
- 2 teaspoons toasted sesame seeds, crushed or whole
- 1 clove garlic, crushed
- 1 whole stalk scallion, chopped
- 1 inch ginger, minced
Instructions
Stage 1 – Pre-Soaking and Preparing
- Place your rice in a bowl. Rinse clean several times then also submerge and soak for at least 1 hour
- Create your yangnyeomjang sauce. Combine your soy sauce, sesame oil, rice vinegar, gochujang (on Amazon), garlic, sesame seeds, scallion, and ginger. Set aside once done
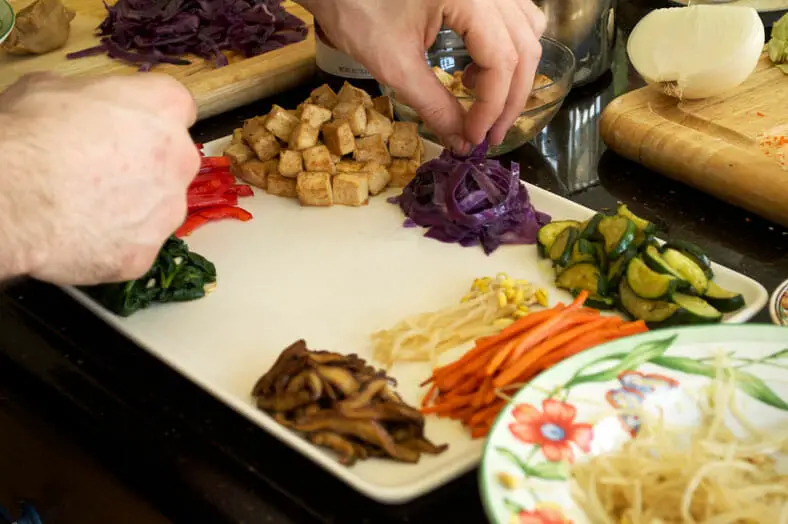
- Prepare and set aside all the remaining garnishes, kimchis, and sauces
- Finally, set aside a 5-6 mini bowls or ramekins, a serving platter for all your “topping” ingredients, 2 pots, and 2 pans.
- On the serving platter, set the enoki mushrooms and red bell pepper as raw ingredients.
- And the fun begins 🙂
Stage 2 – Preparing all Sauces
- For the Spinach: Mix together in a ramikan ½ tablespoon of sesame oil, 1 clove of minced garlic, and 1 tablespoon of soy sauce
- For the Tofu: Mix together in a ramekin 2 cloves of minced garlic, 1 tablespoon soy sauce, 1 tablespoon of sesame oil, and 1 teaspoon of black pepper
- For the Mushrooms: Mix together in a ramekin 1 tablespoon of soy sauce, 1 tablespoon of sesame oil and 1 teaspoon of coconut sugar
- For the Red Cabbage: Combine 3 tablespoons of rice vinegar, ½ teaspoon of coconut sugar and 3 tablespoons of water into a ramekin
- For the Bean Sprouts: Combine 1 clove of minced garlic and 1 tablespoon sesame oil
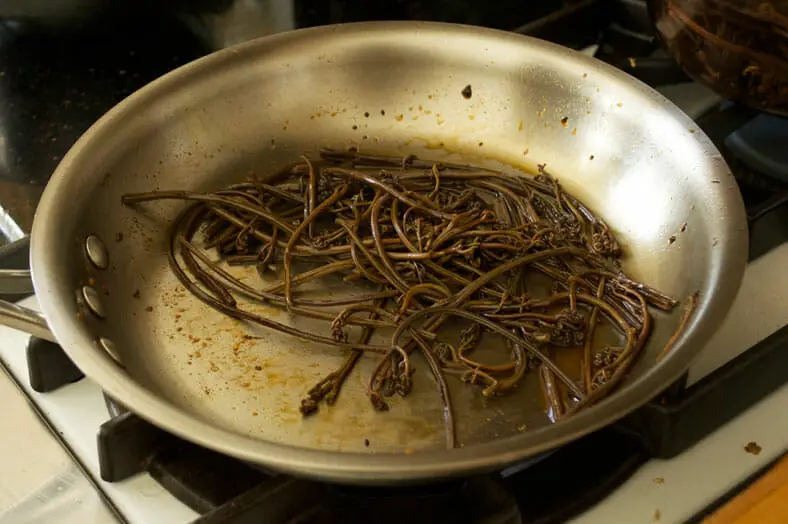
- For the Kosari: Combine 1 tablespoon olive oil, 1 tablespoon soy sauce, ½ teaspoon coconut sugar, 1 tablespoon sesame oil, and 1 teaspoon black pepper
Stage 3 – Blanching Vegetables
- In one pot, submerge the bean sprouts in a pot of cold water with 1 teaspoon of salt. Bring the pot to a boil for 20 minutes
- In another stockpot, bring a pot of water to boil, then add your spinach. Boil the spinach for 1 minute before removing from the pot and shocking in an ice bath
- Once the spinach has been removed from your boiling stockpot, add your red cabbage and boil for 2 minutes
- While the cabbage is boiling, combine your spinach and its sauce in a small bowl. Mix well then place on your serving platter.
- After 2 minutes, remove the cabbage and also submerge in an ice bath
- Drain the water from the cabbage and combine with the sauce. Mix very well before draining once more and adding to your serving platter
- Take your dried dashima and add to the the boiling water. Take the pot off the heat and let the kelp soak in the hot water for 10 minutes
- After 10 minutes, remove the dashima, drain of excess water, and place on your platter.
- By now, the bean sprouts should be done as well. Remove them from the pot and drain of excess water, then mix the bean sprouts together with the sauce prepared for them
- Once the sauce has been mixed in, set the bean sprouts onto your serving platter
Stage 4 – Cooking the Rice
- Drain the rice of the water in which it soaked, and place it in a sauce pan. Cover with water to a level of about 2 centimeters above the rice, or about ~3 cups of water for every 2 cups of rice
- Cover your pot and bring the water to a boil. Let the rice boil for 5 minutes
- After 5 minutes of boiling, reduce the heat on your stove to a simmer, and let the rice cook for another 8 minutes
- After 8 minutes, turn the stove heat off altogether, but keep the stockpot covered and let the rice steam for 10 more minutes. Do not open the top prematurely
- After 10 minutes, toss the rice and scoop from the bottom up, then cover again. You’re going to let it steam further as you tend to the remaining “topping” ingredients
Stage 5 – Cooking the “Topping” Ingredients
- First, the zucchini:
- Bring a pan over medium-high heat and add 1 tablespoon of olive oil.
- Once the oil is hot, add your zucchini with a pinch of salt and reduce the heat to medium. Let the zucchini cook for ~5 mins or until translucent. Shake the pan occasionally
- In another pan, tackle the tofu:
- In the meantime, take another pan over medium-high heat and add another 1 tablespoon of olive oil.
- With the oil heated, add your tofu and stir around. Cook for 2 minutes stirring around so the tofu doesn’t stick
- After 2 minutes, add the sauce for the tofu into the pan and deglaze. Stir around and let sit for another ~5-7 minutes, stirring occasionally.
- Take zucchini out, and put in mushrooms
- By now, the zucchini should be translucent and ready to come out. Take them out of the pan and set them aside on your serving platter.
- Add another 1 tablespoon of olive oil to the pan, then add the shiitake mushrooms a few seconds later once the oil has had a chance to heat.
- Cook the mushrooms for 5-6 minutes, as they start to shrink and soften
- Tofu done, now the kosari
- Once the tofu is ready to be taken out, remove from the pan and place on your serving platter
- Add another 1 tablespoon of olive oil and add your kosari a few seconds thereafter.
- After 1 minute of cooking, add the sauce for the kosari as a deglaze and cook for another 1 minute
- Remove the kosari from the pan and set aside on the serving platter
- Finally, the carrots after the kosari
- Add another 1 tablespoon of oil to the pan, then add the carrots soon thereafter.
- Sautee for 30 seconds, then remove from the pan and place on the serving platter
- By now, the mushrooms should be done, at which point they too can be added to the serving platter
- And you’re done!
- Prep Time: 60 mins
- Cook Time: 20 mins
- Category: Main Dishes
- Cuisine: Korean
Wow what an educational read! I love learning more about dishes I’m unfamiliar with.
Thank you! And yeah, we’re totally with you.. it is so fun to learn about new dishes like this 🙂
I love bibimbap–I am beyond pumped to try this!
Awesome, Kristen! Let us know how it goes for you!
What a delicious feast in a bowl! Love Korean food and this Bibimpab look amazing!
Indeed it was, Manila Spoon! If you happen to give this one a try (or any other type of Bibimbap, for that matter) let us know 🙂