If you grew up in the US like we did, chances are good that you’ve probably heard this saying at least a few times in your life.
As American as apple pie.
Never minding that we Americans sometimes use strange proxies to qualify our patriotism (i.e. Budweiser beer, Uncle Sam, PB&Js, etc), we were curious as to how the apple pie really came to be so American after all.
Where that simple question took us we couldn’t have ever expected.

Apple Pie, Middle Age Europe, Bees, and John Chapman
As a relatively young ~250 year old nation, we start this journey with the going assumption that America was not the first one to invent the apple pie… or any pie for that matter.
It didn’t take long to confirm this sound hypothesis of ours.
The Origin of Apples
The apple has served a prominent role in the cuisines of many empires throughout the centuries, both for culinary as well as medicinal reasons.
The most likely ancestor of the contemporary edible apple – note: not crab apples – can be traced back to a wild genus of apple tree, Malus sieversii, in what is now modern day Kazakhstan. As part of a fairly casual tour to conquer the world, Alexander the Great purportedly encountered these apples around ~328 BC. He was so delighted by the taste and versatility of this new discovery that he insisted on bringing back these trees to grow and cultivate back in the Macedonian homeland.
Even as the Macedonian Empire fell, the ubiquity of apples continued to spread throughout the continent and into the daily lives of other powerful Empires. Both the Greeks and Romans, for example, held the apple as a highly regarded component of their diet and disseminated its growth and cultivation throughout the rest of Europe.
Around the 2nd century AD, an astoundingly influential Greek physician named Galen of Pergamon (whose accomplishments deserve their own post altogether) established a set of observations on how various foods affected the human pathology. According to Galen, there were four distinct humors (fluids) that dictated the health and temperament of a person: blood, choler (yellow bile), phlegm, and melancholy (black bile). In order to stay healthy and maintain a good balance of these humors, Galen suggested that apples were a premier food to help with digestion post-meal and to maintain a healthy balance particularly between the phlegm and melancholy humors.
Galen’s findings and suggested remained at the forefront of the medical field until well into the 16th century, which you can certainly imagine triggered the consumption of a whole bunch of apples across the entire continent.
You May Also Like…
If you love recipes made with alcohol, or just love treat recipes made with alcohol you ought to check out our spiked eggnog coffee recipe made with brandy from Chile, or our homemade cake and coffee recipe spiked with whiskey, kahlua, grand marnier from Greenland!
And Then Came the Apple Pie
Technically, pies in a more generic sense have been around since the ancient Egyptians. By baking processed cereal grains with various fillings, people have long leveraged pies as an economical, easy-to-make and long-lasting source of nutrition. As with the apples, the concept of the pie is thought to have been spread throughout Europe with the Romans and their effective network of roads throughout the continent.
As far as we know, however, the apple and the pie did not first make acquaintance until as late as the 14th century. The first “official” – meaning transcribed – recipe for the apple pie comes from an Old English cookbook written around the year 1381, which amazingly is available to see online. Have a look here at the first apple pie recipe (at the bottom) and take a crack at reading it… it is a pretty difficult but fun challenge.
That’s not to suggest, however, that the apple pie was invented in England. The apple pie began appearing in cookbooks elsewhere around Europe as well, although perhaps most notably in Holland. In the 1514 cookbook Notable Boecxken van Cokeryen, there is a recipe for the first appeltaart – directly translating to “apple cake” in English – that also features one of the first lattice weaves along the top of the pie.
Alas, this is clearly transcribed and readily available proof that the apple pie actually has a far longer history than United States itself.
So how did apple pie become so “American”?
How Apple Pie Was Brought to America
The first waves of European settlers into the new lands of America began as early as 1492 – though the Jamestown colony in 1607 marks the first long-term settlement – but there’s no evidence to suggest an immediate local adoption of apple pie thereafter.
But why? For a recipe that had become so popular throughout all of Europe for several centuries by now, what took the apple pie so long to reach America’s shores?
Here’s the answer you might not have expected: bees.
There were indeed several species of apple tree growing natively to American lands, but the fruit borne from these trees were more similar to crab apples, more sour and largely inedible. It took several years for the original settlers to realize that the new lands lacked a type European honey bee, the Apis mellipona, to pollinate their apple trees to bear sweet and delicious fruit instead.
Beginning in 1622, the Europeans began importing this critical honey bee to America, and the apple trees and honey bees co-evolved together in the new land to bring new forms of the delicious fruit to the table. With sweeter fruit, the recipe for a good spiced apple pie could now thrive locally.
And with the help of gentlemen like John Chapman, the apple could spread through the new lands as well.
Johnny Appleseed Was Real
This is more an aside than anything else, but for the Americans that know of Johnny Appleseed, you’d be glad to know that he was indeed a real person.
Originally born in Massachusetts, John Chapman apparently long seemed suited to the nomadic lifestyle and to one surrounded by apple orchards. After an apprenticeship at age 18 under an orchardist left him inspired and in love with apples, Chapman set out essentially to “spread the joy” of apples to the rest of the country.
Over the course of his life, John Chapman actually built a pretty successful business out of cultivating new apple orchards around new potential settlements. In what you could call surprisingly speculative work, he would find an unoccupied plot of land and build up the orchard from scratch. Once the orchard was self sustaining, he would sell shares to the orchard and move onto the next opportunity.
By the end of his life, he had successfully spread apple orchards around large parts of Pennsylvania, Ohio, Indiana, Illinois and West Virginia. Partially because of this work – but mainly due to his odd burlap sack-esque attire and his unlimited supply of appleseeds – John Chapman became known and is still remembered as “Johnny Appleseed.”
Turning Apple Pie American
For some hard to explain reason, the 20th century brought good things between the apple pie-American relationship. Recipes for apple pie began appearing in all sort of American cookbooks (without any mention of cultural heritage), and newspapers began touting the apple pie as “a symbol of the prosperity of America.”
As for the term “as American as apple pie,” the notion seems to have been popularized by soldiers gearing up to fight in World War II. When asked by journalists why they were going to war, the common response was “for mom and apple pie.”
Eventually, “mom” was dropped, and the catchy slogan we all now know was born.
About the Recipe
Making an apple pie may seem daunting to some, but it needn’t be. In fact, there are only really three key components to building a perfect apple pie with a perfect lattice top from scratch: the pie crust, the filling, and the lattice weave itself, but no worries we have some helpful tips on how to make the best flaky pie crust.

The Pie Crust
Granted, the pie crust might be the most technical pieces of the greater apple pie puzzle, and there are a good set of tricks to creating the perfect crust. What your pie crust really boils down to, though, is just finding the right ratio between your flour, your fats and your liquid.
When it comes to flour, the key determinant in how flaky or hefty your pie crust becomes is the flour’s protein content. Lighter-protein flours like pastry flours will help create a nice lightness and flakiness in your crust, although an all pastry flour crust might turn out a bit too brittle and delicate to the touch. Conversely, an all coconut flour crust will come out hard as a rock (something we learned the hard way). Finding a good balance between both a lower protein and a higher protein flour seems like a good way to go.
You’ll start by placing your flour and other dry ingredients into something like a mixer or a food processor (on Amazon). The next step here is to then add colder, relatively coagulated fats. Because the entire crust will go back into the fridge to cool and re-congeal, you don’t want to have your fats easily melt and thereby take a longer time to re-solidify. When adding your fats in, for example, a food processor (on Amazon) (like we did), you’ll want to pulse the fats into the flour bit by bit. Pulsing will help you break the fats and spread throughout the flour, but it won’t generate the same amount of potentially melting heat that an always-on processor would.

And finally, there’s the liquid. A lot of recipes you’ll come across will suggest you add water or vinegar, but we present to you a different option for a more consistent result: alcohol. The reasoning here isn’t to create a boozy pie, but a higher-proof spirit like vodka or whiskey will help you combine the dough while reducing gluten formation. In the case of your pie crust, gluten formation hardens and toughens your dough, which is the opposite of what you want to have happen.

If you use an alcohol (like the apple whiskey we used in our recipe), you’ll want to pour it into your flour/fat mixture bit by bit and work it in. The goal is to develop a mealy, crumby texture between all your ingredients that will end up yielding a delightful crust. Continue to slowly add and mix in your liquid until it has been added in full.

Finally, you’ll want to begin forming your entire pie crust and then re-cool it to let the fats re-solidify. The best way to do this is by creating two equally sized discs – each with half of your fresh mealy crumb mixture – onto a long sheet of either plastic wrap or aluminum foil.


Mold the meal into the shape of a disc, cover it in your wrapping, then place in the fridge for (based on the ingredients of our recipe) at least 20 minutes.

At this point, you can focus on your filling, although we’ll come back to the crust when it’s time to create the lattice.
The Filling
The apple pie filling is without question the easiest and, once they’ve been peeled and cut, the most hands-off part to the entire pie.

Assuming you’re buying your apples fresh like we did, you’ll start by wanting to peel the skin off your apples and coring them. The more you can get the apple pieces to be more purely the “fleshy” part of the fruit, the softer and tastier your apple filling will get when the pie bakes. The skin, unfortunately, is simply too fibrous to be any good in a softer filling like this one. It’s also important to try and cut your apple slices so they are all approximately the same size, so your pie bakes evenly.

Once you have your apple slices peeled, cored and cut, you’ll want to first let them soak in with the sugar. We found a fantastic tactic to do this, since you can actually collect a delightful syrup to top your apple pie with just prior to baking.
Toss your apples with your sugar into a colander, which you then place over a small bowl. Let the apples sit for at least 20 minutes (the same time it takes for your crust to harden), at which point you’ll see a collection of syrup at the bottom.

Before tending to your crust and putting it all together, you can then toss your apples – which are now slightly softer and reduced – in whatever seasonings you like. Set aside as you head to assemble the entire pie.


The Lattice Top
Before talking about the lattice topping, here’s a good time to resume your work with the pie crust. By now, it has spent some time to cool and re-harden in the fridge, so you’ll want to remove one disc at a time to flatten it out.
Remove your disc from your plastic wrap or foil, and set it on a similarly-long floured piece of parchment paper. Flour both sides well, then cover your disc in the parchment paper.


Here, you’ll want to use a rolling pin to get the crust as thin as you can – ideally at least 1/4 inch in thickness – without breaking the crust. The first disc will become the base of your pie crust, which you neatly tuck into the bottom and sides of your pie dish.

The second disc will, however, do something entirely different. And onto the lattice top we go!
If a picture is worth a thousand words, then a video is worth a million.
So we valiantly attempted to write out specific instructions for making a proper lattice top for your apple pie, but we learned the hard way that a simple ~2 minute video could do a far better job than we at explaining it.
And so, we present to you a helpful video on how to lattice your apple pie:
With your lattice ready to go, take a brush and drizzle some of the accumulated apple/sugar syrup over the top. From there, you can pop the pie in the oven, bake, and you’re done!


Our Take on the Recipe
With such a wealth of American apple pie recipes these days, we set out on a small challenge for ourselves to make a pie as (relatively) healthy and unprocessed as we could for everyone to enjoy. Based on these criteria, we absolutely loved a pumpkin spiced vegan apple pie recipe from the Minimalist Baker, which we used as the basis for our own version of the recipe.
In wanting to make a more traditional apple pie, we started by removing the pumpkin spice and pumpkin butter from the original reference. In place of the lost pumpkin spice, we subbed in ground allspice instead, which came out beautifully alongside the cinnamon.
Perhaps one of the biggest – and riskiest – adjustments we made came within the crust. In this goal of going as unprocessed as possible, we swapped out vegan butter in favor of coconut oil. Admittedly, this took several test batches to get right, but we thankfully proved to ourselves that it could be done.
We do have a slight theory that the apple whiskey substitution for the water did help maintain the crust better, but that’s more an unsubstantiated hunch of ours than anything else. The apple liquor did give a nice apple-flavored zing to the crust overall, though.
For the filling, we made a small omission of the flour and instead used arrowroot powder to bind the apples together. We also used a mixture of various apples like Granny Smith, Gala, etc. more to add variety to the filling than anything else.


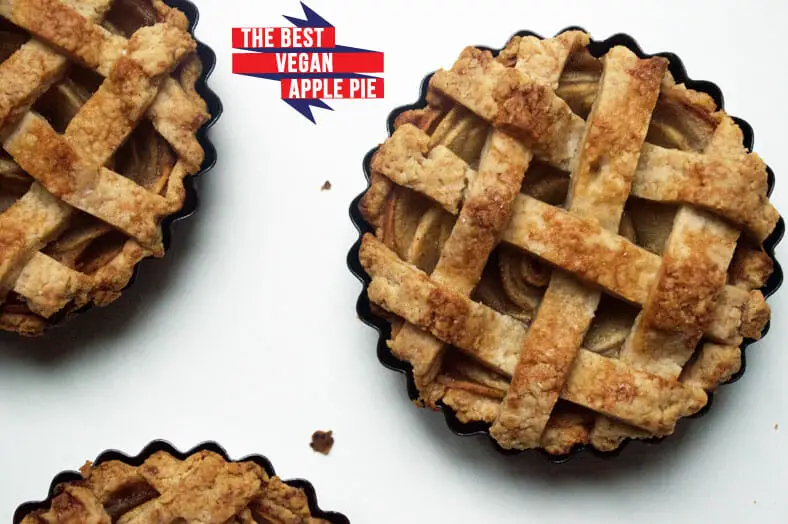
Finally, you might notice how petite and minuscule our pies came out. You can chalk this one up to us playing around with one of our test batches that happened to yield something really cool. The recipe itself is geared to make one large 9-inch diameter apple pie, but we found it could make a whole set of fun smaller-sized mini-pies if you so choose.
Either way, you can’t go wrong with this now-American treat. This recipe does take a little bit of time, but it’s so very worth it! In a pinch for time, but still want a good sweet treat? Try some Dutch cookies (takes around 35 minutes), a sponge cake, or a chocolate croissant with walnuts instead.
Enjoy!
How do you prepare your apple pie? Comment below!


Vegan Homemade Apple Pie with Lattice Weave
- Total Time: 1 hour 5 minutes
- Yield: 6 people 1x
Description
Vegan Homemade Apple Pie with Lattice Weave with ground cinnamon.
Ingredients
Vegan Pie Crust
- 1 cup organic pastry flour
- 1 cup organic whole wheat flour
- 1 teaspoon sea salt
- 1/2 teaspoon ground cinnamon
- 2/3 cup coconut oil, pre-chilled in either freezer or fridge
- 3/4 cup apple-flavored whiskey (we used Crown Royal) or other liquor or water
Filling
- 8 whole apples, peeled, core and thinly sliced
- 1/4 cup brown sugar
- 1/4 cup coconut sugar
- 1/4 tsp sea salt
- 1/2 tsp ground cinnamon
- 1/2 tsp ground allspice
- 2 tablespoons arrowroot powder
Instructions
Stage 1 – Peel, Coat and Soak The Apples
- Start by peeling all of your apples followed by coring and chopping the apples into small slices. Place all your apple slices into a large bowl
- Add your coconut and brown sugar into the bowl of apple slices, and toss everything together
- Pour the sugared apples into a colander and place over a smaller bowl. Let these apple slices sit in the colander for at least 30 minutes while you tend to the crust. The bowl underneath the colander will collected a delicious and flavored syrup to be used for later
Stage 2 – Tending to Your Apple Pie Crust
- Start by placing your flours, sea salt and cinnamon into a food processor (on Amazon). Pulse several times simply to quickly mix your dry ingredients together
- Next, take your coconut oil (which should be ice cold and very solidified) and add cut chunks of the oil into the food processor
- Pulse everything together in your food processor at least 6-7 times to break the coconut oil down further. Note: you want to pulse but not process. Processing will go too fast, give off heat and potentially melt your coconut oil. No good
- Follow by pouring the first half of your apple liquor into the food processor and pulse the crust together. Pulse at least 5-6 times as the ingredients begin to combine and create a mealy texture
- Add the next half of the apple liquor and pulse again. By now, you should have a nice, moist meal of your potential apple pie crust
- With your crust done, lay a piece of long plastic wrap on a flat surface. Pour half of your pie crust meal into one part of the plastic wrap. Roughly mold and press the meal together into a combined disc of a crust, then fold the other half of the plastic wrap
- Close your plastic wrap and press the wrap firmly into your disc, then place the crust into the fridge for at least 20 minutes
- Repeat the entire process with the other half of your pie crust meal
- While your pie crust discs are in the fridge (and the fats re-coagulating), you can tend to the remainder of your apple pie filling
Stage 3 – Finish Filling and Create Piecrust
- First, preheat your oven to 400 degrees Fahrenheit and place your baking rack on the bottom-most level
- A few minutes before taking your pie crusts out of the fridge, pour your sugared apples from the colander back into the original large bowl
- In the bowl, toss in your sea salt, cinnamon, ground allspice and arrowroot powder. Toss around until you feel everything has been well distributed and coated on the apples
- Next, take your first disc of apple pie crust out of the fridge, and unwrap it from the plastic wrap
- Take a similarly long piece of lightly floured parchment paper and lay your disc in the middle of one side of the parchment paper. Sprinkle a bit of flour directly onto your crust, then fold the other half of the parchment paper over to cover both sides of your pie disc
- Use a rolling pin to evenly roll and flatten your piecrust in all directions. You want to flatten the piecrust until you’ve gotten about a 1/4 inch thickness out of the crust
- Next, lie your flattened piecrust into your pre-greased (with coconut oil) or no stick pie dish and press it up close to the edges of your dish
- With your crust laid in the dish, lay your apple pieces into the crust, starting from the outside moving inward
- Continue until you’ve covered all the surface area of your pie with your apple filling, then you can move onto the lattice topping and final preparations
Stage 4 – Lattice Finish and Final Touches
- With your other disc of piecrust, repeat the same process as earlier by removing them from the plastic wrap and placing in a pre-floured piece of parchment paper
- Like earlier, use a rolling pin to flatten this crust until a similar 1/4 inch thickness
- Then, take a sharp knife (or a paring knife) and cut as many evenly-sized thin strips from the dough
- Take your first three strips and lay them flat onto your pie with about ~1 inch space between them, ensuring that all three strips make it across the entire diameter of the pie
- Take another strip of your flattened dough and weave it through the first three strips. You want to alternate between going over and under the existing strips to create a clean weave
- Repeat this weave with at least two more strips in order to create your full lattice top
- Finally, before placing in the oven, take a small brush and the bowl of syrup of the soaked apples (i.e. the juices that had dripped from the colander in Stage 1) and brush over the lattice top and the apple filling. Just be sure not to touch the syrup to the pie dish, otherwise the pie will stick to the pie dish after baking.
- Place your apple pie into the oven and bake for 30 minutes
- Once the apple pie is fully baked (and the lattice top is golden brown), take out of the oven and remove from the pie dish when it’s cooled… and enjoy!
- Prep Time: 35 mins
- Cook Time: 30 mins
- Category: Dessert
- Cuisine: American

Love this whole post – except that the adorable mini pies are so beautiful, it seemed a shame to cover the rosettes with lattice. (Small quibble indeed.) In any event, I have to admit that I’ll stick with a crust made with butter or a combo of butter and vegetable shortening, but the filling looks divine and I’d gladly try it in a heartbeat. Lattice is always great for impressing the crowd too. Hard to get right, but worth the effort for the oohs and aahs before the pie is decimated by the hungry masses.
Couldn’t agree with you any more about the lattice, Laura, and we are also kind of with you too on covering the rosettes as well. It was a tough call, but the show had to go on 🙂