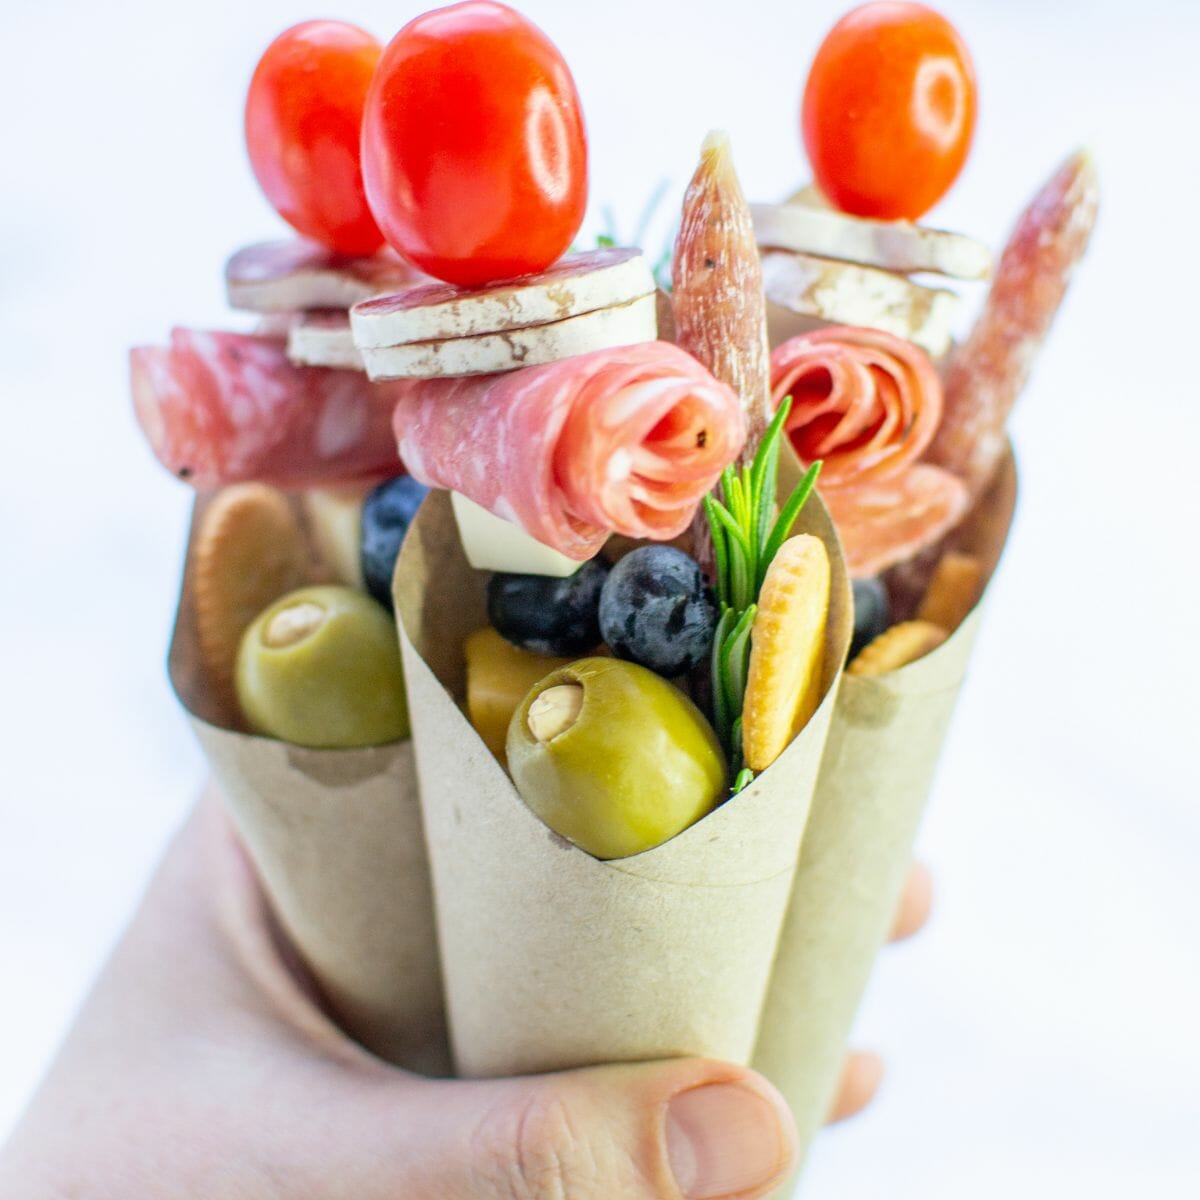
Charcuterie cones are an easy, convenient way to serve up a variety of charcuterie ingredients in a cute, hand-held package. We’ll show you how easy it is to make them! Perfect for large parties, weddings, bridal showers. See instructions or scroll down below to watch video!
What is a charcuterie cone?
Charcuterie cones are typically filled with cheese, salami, nuts, fruit and pickled items and may also include crackers or bread as desired. They are placed in food-safety paper rolled up into a cone, and placed on ice cream holders or displayed lying down on a large cutting board (on Amazon).
Materials and Ingredients:
- thick Parchment, wax, or food safety kraft paper (think paper used to wrap your subs)
- bamboo skewers – 6-8 inches
- olives
- grapes
- salami or pepperoni
- blueberries
- pretzel sticks
- pretzel chips
- meat sticks
- small crackers
- cherry tomatoes
- cubed cheese (try mozzarella or Havarti cubes)
- optional rosemary sprigs (for garnishing)
My Favorite Cone Holder on Amazon
 Buy Now →
 (on Amazon)
How do I assemble the individual charcuterie cones?
Step 1: Gather all the required supplies
In order to assemble the charcuterie cones, you will need white paper, parchment paper, tape, a toothpick, cheese such as dill Havarti cubes and sharp cheddar slices, meat such as salami and other options like pretzel sticks, small crackers and garnishing such as a rosemary sprig. A cherry tomato to go at the top makes a great presentation.
If you’re looking for options that exclude pork, explore charcuterie with no pork varieties to accommodate all your guests’ preferences.
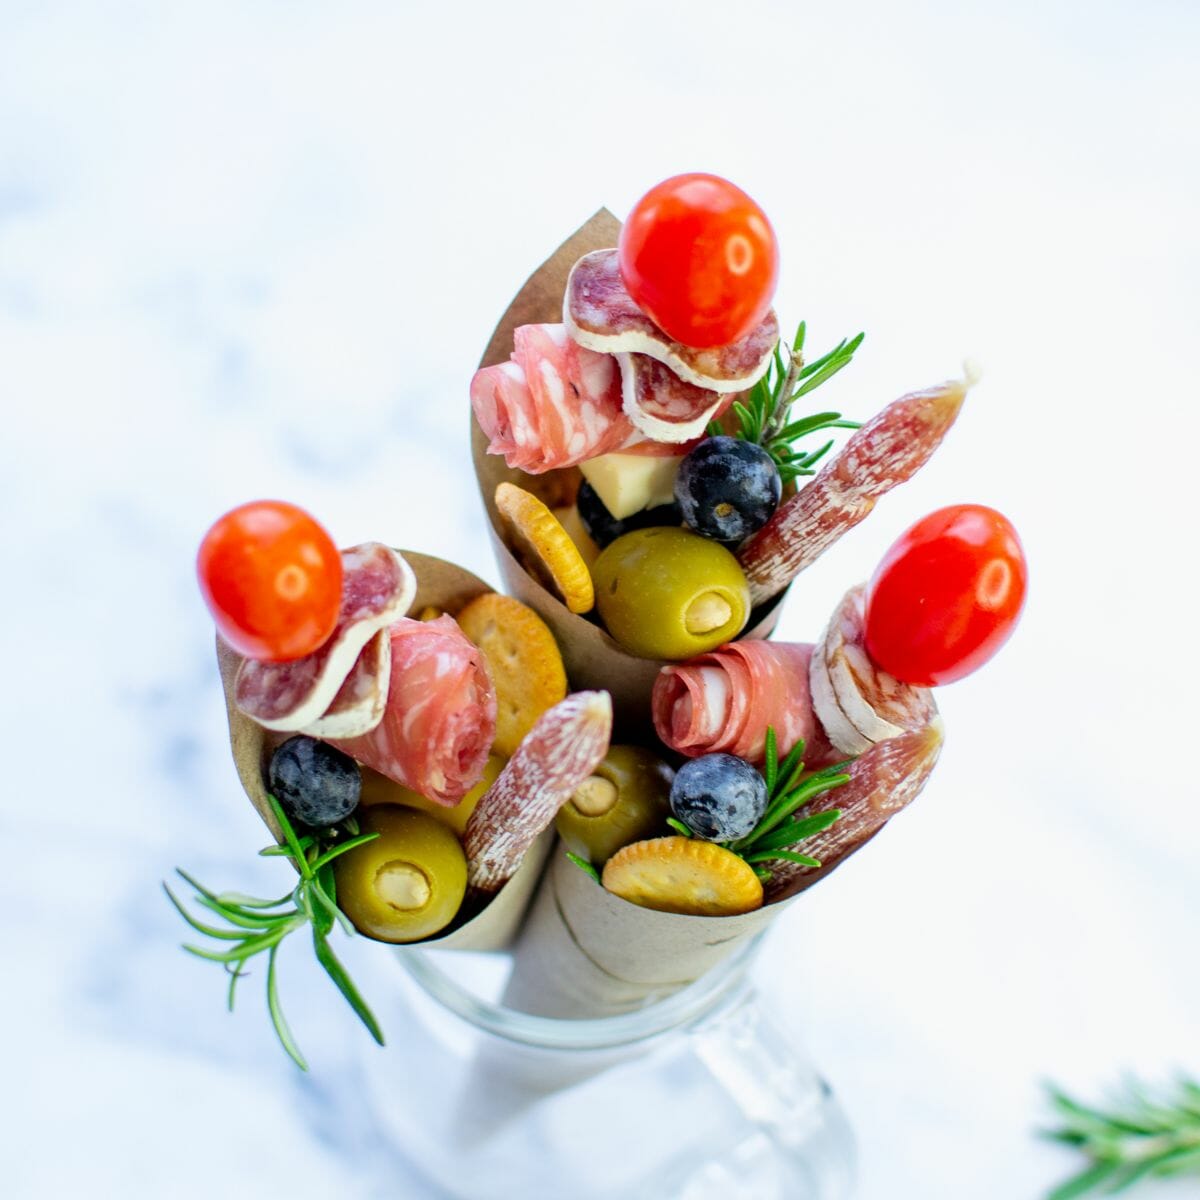
You can display the cones on a platter, tray, or you can stand them upright in a glass or plastic cup. You can fit around 3 cones in each cup. We’re using 6-8 inch skewers here instead of 8-10 because you don’t want to have to make tall cones – and you wouldn’t want the skewers to stick out too much. Make sure you soak them in water for at least 30 minutes prior to skewing.
Want to make individual appetizer charcuterie skewers instead? See our other article dedicated to making a perfect individually sized charcuterie skewer. It’s topped with a Babybel and makes for an awesome snack at your next gathering!
Step 2: Choose the size and type of cones
The size and type of cones chosen are important in order to ensure that the cheese, charcuterie, and other toppings fit snugly inside. You want it around 6 inches tall- around the size of a sugar ice cream cone. I find that it’s the perfect size to fit just the right amount of ingredients.
Step 3: Prepare the cones
Prepare the cones for the charcuterie by starting with one corner of the paper and rolling it towards the opposite corner. Use scotch tape to tape it. If the paper you’re using is slightly thin, roll it over several times.
Step 4: Make a skewer
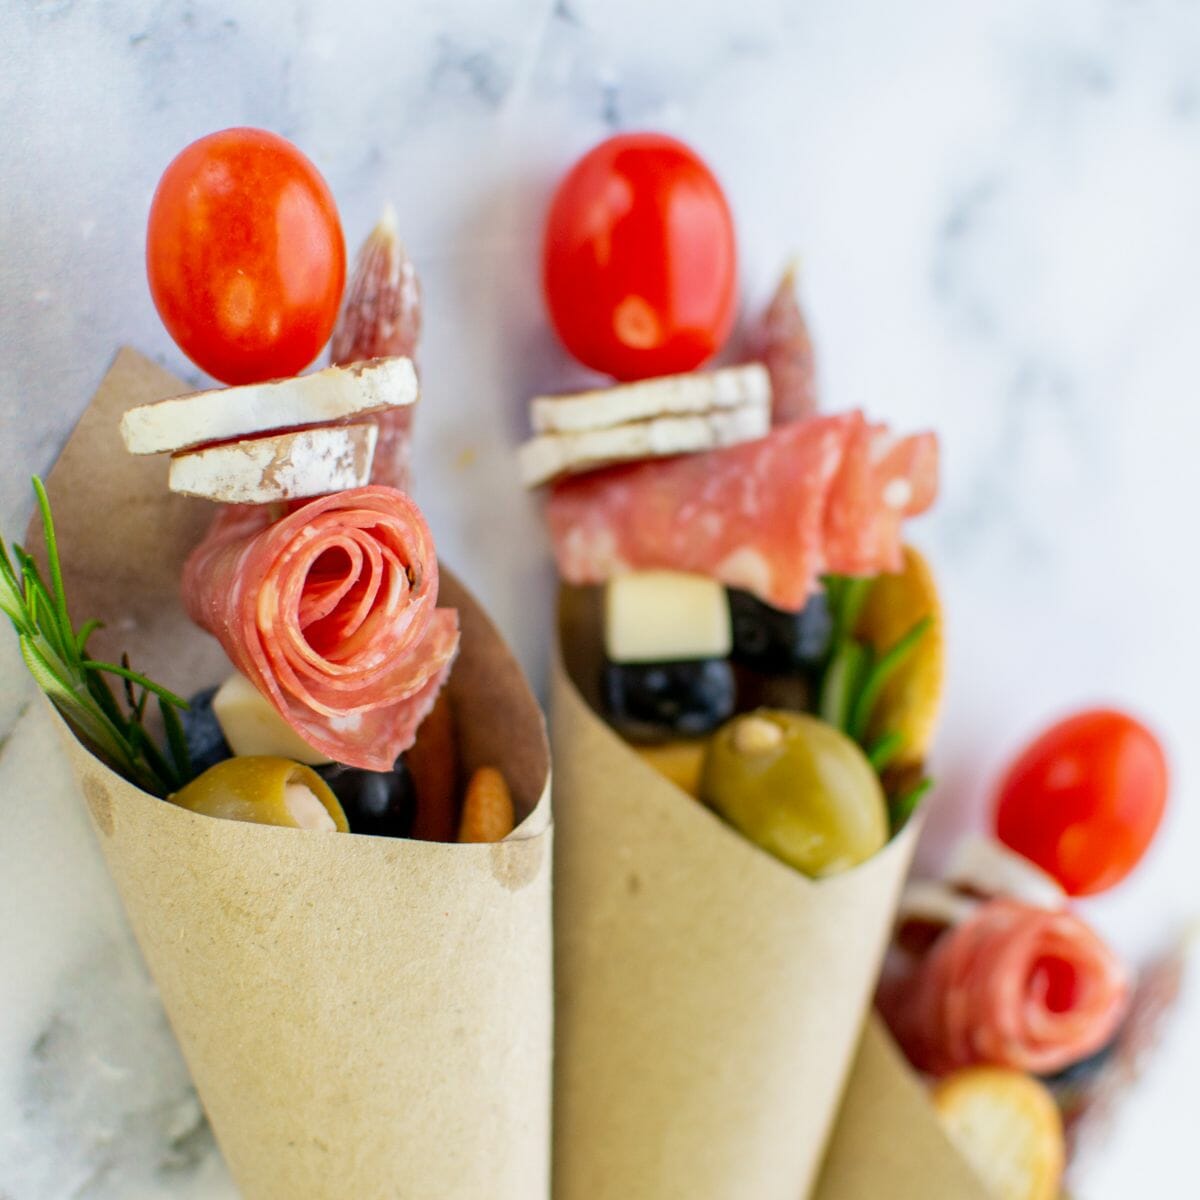
I would first make a skewer – choose a size that is slightly taller than your cone but not much taller – and definitely not shorter. Start with a mozzarella or other cheese cube at the bottom and make your way up. Finish with a cherry tomato. For complete instructions and ideas for a charcuterie skewer see our other article.
Step 5: Add extras to the cone
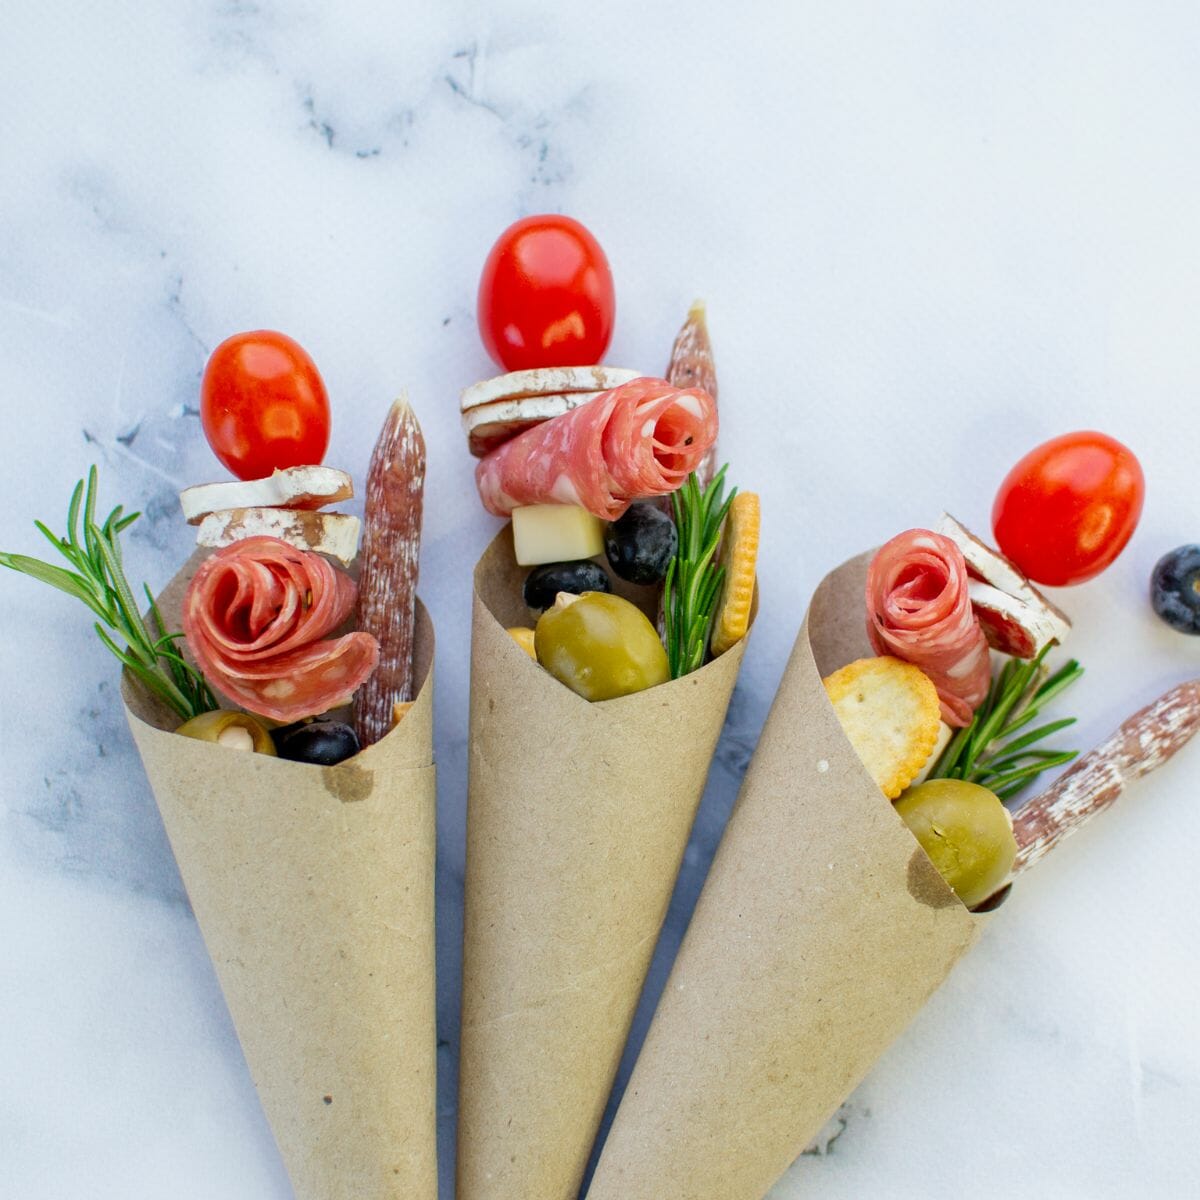
Fill the cone with pretzel sticks, some pretzels – just enough ingredients to hold the skewer in place. Then insert skewer and finish by adding more toppings such as crackers, blueberries, a meat stick, and optional rosemary sprig for garnishing.
Once finished, place the cones on your holder, or display them fanned, lying down, on a large tray or charcuterie board.
Step 8: Display
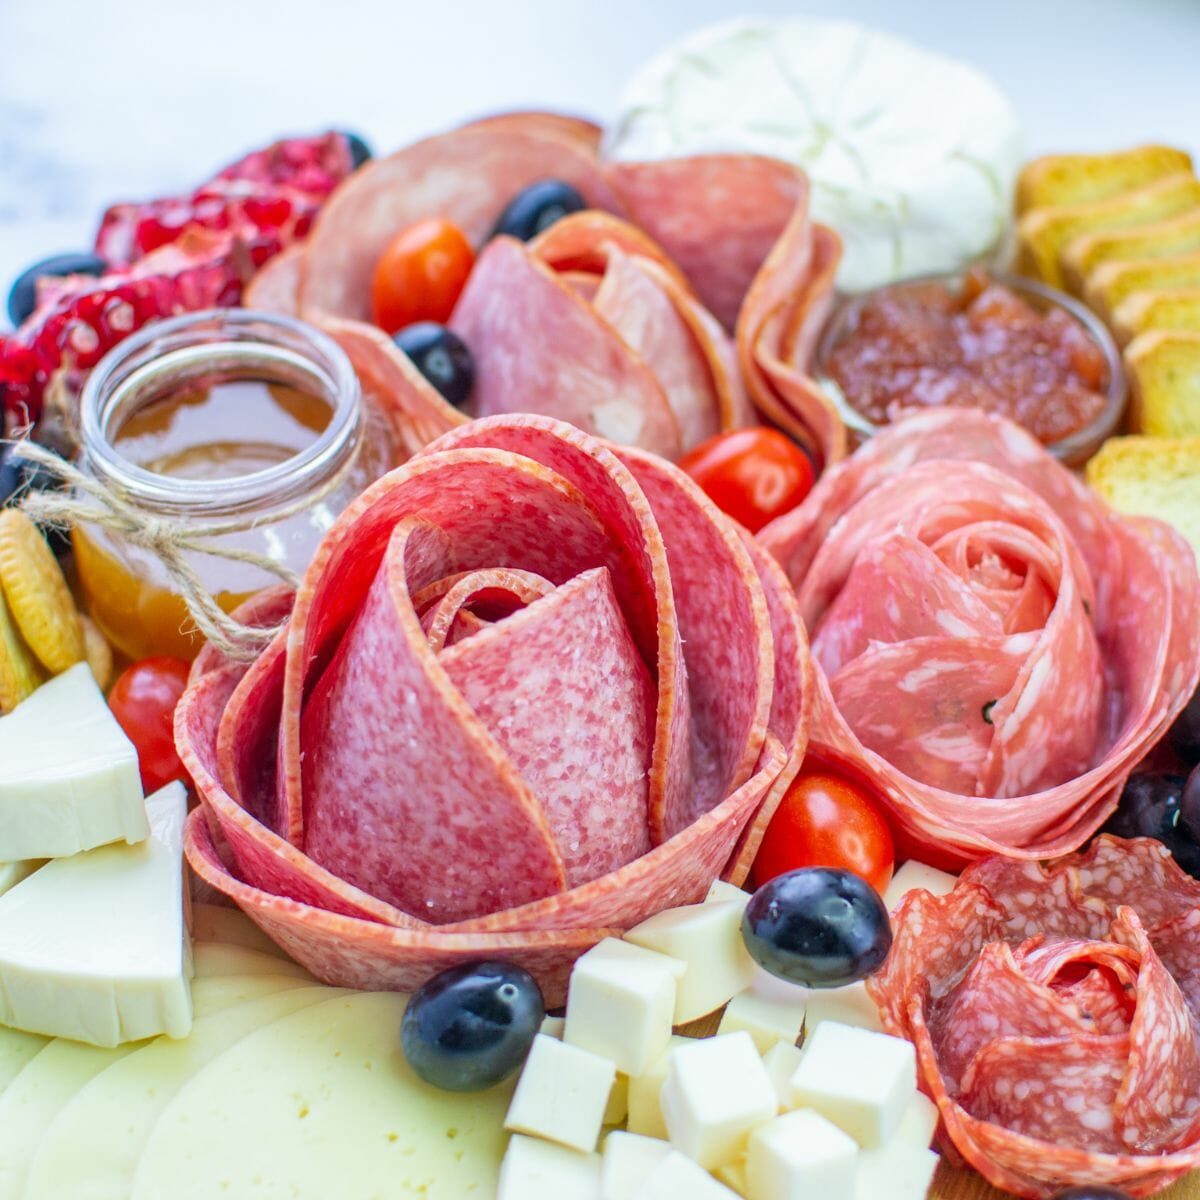
If you are displaying your charcuterie cones on a wooden tray or large cutting board (on Amazon), you might want to also add other items to make it look even more spectacular. Try making a charcuterie meat flower for parties and weddings – see full tutorial with pictures and video in our other post.
What are some tips for serving and presenting my individual charcuterie cones?
1. Use a clear and attractive presentation stand.
Using a clear and attractive presentation can help charcuterie cones stand out and attract attention. Displaying them in a bamboo cone holder (on Amazon) with double layered paper, and adding tall items like breadsticks, biscotti, or bread as well as meats, cheeses, fruit, vegetables and olives of choice will create a visually appealing look that will draw people’s eyes to the cones.
To top it off with an extra wow factor add some salami flowers around the area. See full tutorial on how to make a meat flower with wine glass here.
4. Consider adding a colorful garnish to the top of the cones.
Adding a garnish to the top of the cones – we choose cherry tomatoes because they’re easy, and has a bright red color that naturally draws attention. If you’re feeling fancy, top it with a Babybel like we did, in our individual charcuterie cheese skewers.
5. Place the cones on a bed of lettuce or other fresh greens.
It is important to place the charcuterie cones on a bed of lettuce or other fresh greens in order to provide a cushion that will ensure the components of the cone (such as cheese cubes, olives, peppers and pickled vegetables, salami slices, and roasted spiced nuts) are properly arranged and do not get lost in the cone. Additionally, it provides an aesthetically pleasing presentation for guests.
6. Use a variety of ingredients and flavors to create an attractive and flavorful presentation.
It is a good idea not to make all the cones the same – change it up! By incorporating different flavors and textures, each cone can be tailored to individual palates while also allowing diners the opportunity to explore new flavor combinations.
Additionally, diverse ingredients add visual interest which can help make the presentation of these appetizers more dynamic.
9. Use a food cone holder to secure the cones and keep them upright – or just place them in a cup!
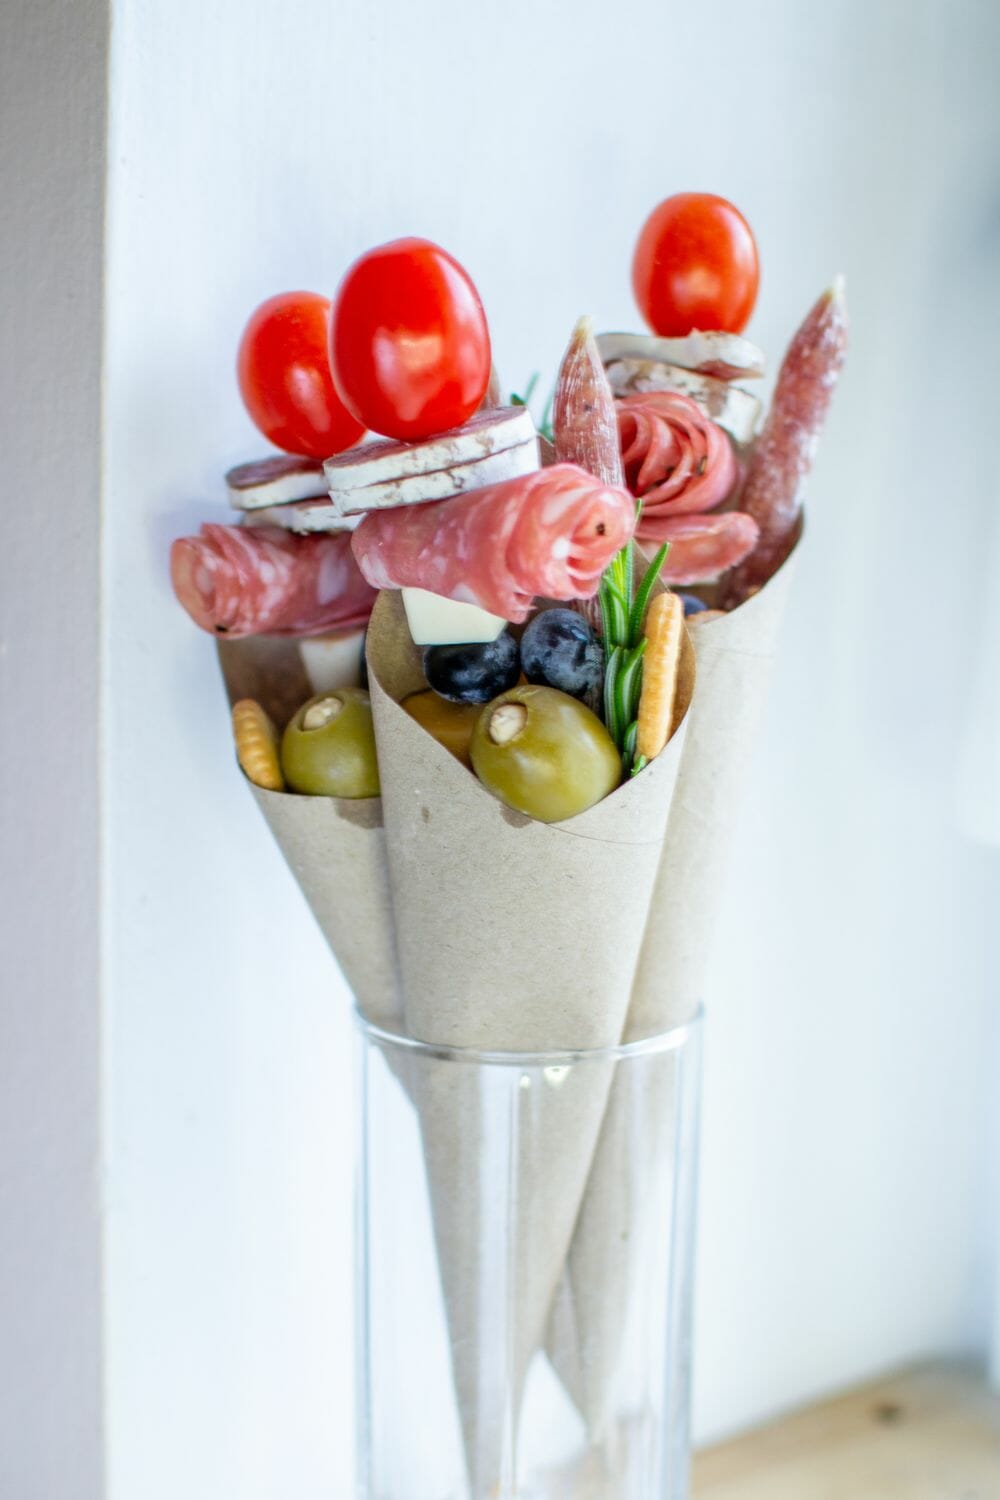
Using a food cone holder (on Amazon) is important when preparing and serving DIY Charcuterie Cones, as it ensures that the cones stay upright and securely in place. This prevents them from becoming wet and soggy, which can affect their taste and presentation. Additionally, using a bamboo cone holder (on Amazon) can make transporting and displaying the cones easier by making them more secure.
Alternatively, you can just fan them out on a round tray or large cutting board (on Amazon) – choose dark wood such as walnut for a better display! Wooden trays and cutting boards made from maple is just too blonde in color, and isn’t as attractive.
FAQ:
How do you serve charcuterie cones?
They can be served in individual servings for customers to enjoy more. Paper cones are an adorable way to present the charcuterie cones. To serve, first trace a circle onto parchment paper and stack on top of wrapping paper. Cut out the circle and then fold each half in half and cut again to make four quarter circles. Tape each piece of the lining cone together to form a cone, then add the longest items (such as grapes, breadsticks or rosemary) at first followed by other ingredients as desired. Finally top it off with soft cheese before serving it with crackers or breadsticks if desired.
What are some ideas for fillings for charcuterie cones?
When it comes to fillings for charcuterie cones, there is an abundance of options. Seasonal and holiday-driven ingredients can be incorporated to create a variety of cone flavors. Popular choices include meats such as salami, ham and prosciutto, as well as cheeses such as cheddar, brie and feta. To make the experience even more special, consider purchasing crackers, breads or jams for added flavor.
What are some ideas for toppings for charcuterie cones?
u003cbru003eWhen it comes to fillings for charcuterie cones, there is an abundance of options. Seasonal and holiday-driven ingredients can be incorporated to create a variety of cone flavors. Popular choices include meats such as salami, ham and prosciutto, as well as cheeses such as cheddar, brie and feta. To make the experience even more special, consider purchasing crackers, breads or jams for added flavor.
What are some ideas for charcuterie cone stands?

You can use wide mouth mason jars, or buy a cone holder (for ice cream). Our favorite one is this bamboo curved cone holder from Amazon.
Cone Holder on Amazon
Buy Now → (on Amazon)

Easy Charcuterie Grazing Cones
Description
Charcuterie cones topped with a cherry tomatoe
Ingredients
- 4–6 ounces of cherry tomatoes
- 6 ounces of salami, rolled into roses
- 6 ounces of kalama olives
- 6 ounces of mozzarella cheese, cubed
- 6 ounces of blueberries
- 8 ounces of pretzel sticks and pretzel chips
- 12 meat sticks
- 12 10″ bamboo or wooden skewers (on Amazon)
- 12 pieces of food safe waxed paper
- a handful small crackers
- (optional) 12 rosemary sprigs for garnishing
- scotch tape
Instructions
Prepare the skewers
- Soak bamboo skewers in water for 30 minutes before using
- Start the skewer with an item that is less likely to move around – such as mozzarella cubes. Push it towards the bottom of the skewer, leaving around 3 inches at the bottom
- Fill the rest of the skewer with olives, blueberries, salami roses (see step 4), and top with a cherry tomato
- Make 12 roses out of salami – fold two pieces of salmi into half circles, overlap them slightly – and roll them. Secure by putting through skewer immediately to hold the shape.
Make the cones
- Using food safe wax paper, roll into a cone by starting at one corner and roll it towards the opposite corner. Secure with tape.
- Set aside until ready to use
Putting them all together
- Start by placing a few pretzel sticks and pretzel chips into the cones.
- Carefully place the skewer in the center.
- Fill the rest of the space in the cones with meat stick and some olives.
- Garnish with a sprig of rosemary.
Display on cone holder. If you don’t have one, you can fit three in a glass cup or wide mouth mason jar. You can also fan them out on a wooden board or marble surface.

Notes
1. You can be uniform and skewer all the sticks in the same order, or mix them up for variety. I would still recommend topping with a red cherry tomato – it helps the cones POP in color
2. Keep in mind when making the cones, that it shouldn’t be taller than the skewer sticks. Cut your wax paper if necessary. Ideally a 6″ tall cone for a 10″ skewer would make a great display
