Onigiri, also known as rice balls, are a staple in Japanese cuisine. They are simple to make and can be enjoyed as a quick snack or light meal. In Japan, onigiri is so popular they’re commonly sold at Seven-Eleven stores as frequently as we sell hotdogs at our Seven Elevens.
In this guide, we will show you how to make the onigiri using just a few ingredients and some simple steps. You don’t need a mold, but you can definitely use one. We’ll show you how to do both.
What is onigiri?

Onigiri is a type of Japanese sushi rice ball that consists of sushi rice compressed into a triangular, cylindrical, or ball shape. It is typically filled with meat fillings such as spam, cooked salmon, or beef. It makes a great light lunch, or a snack on the go! It is most commonly made into a triangular shape, and most wrappers you’d find accommodates this shape, but you can have some fun with it and roll it into spherical shapes, or rectangular shapes instead!
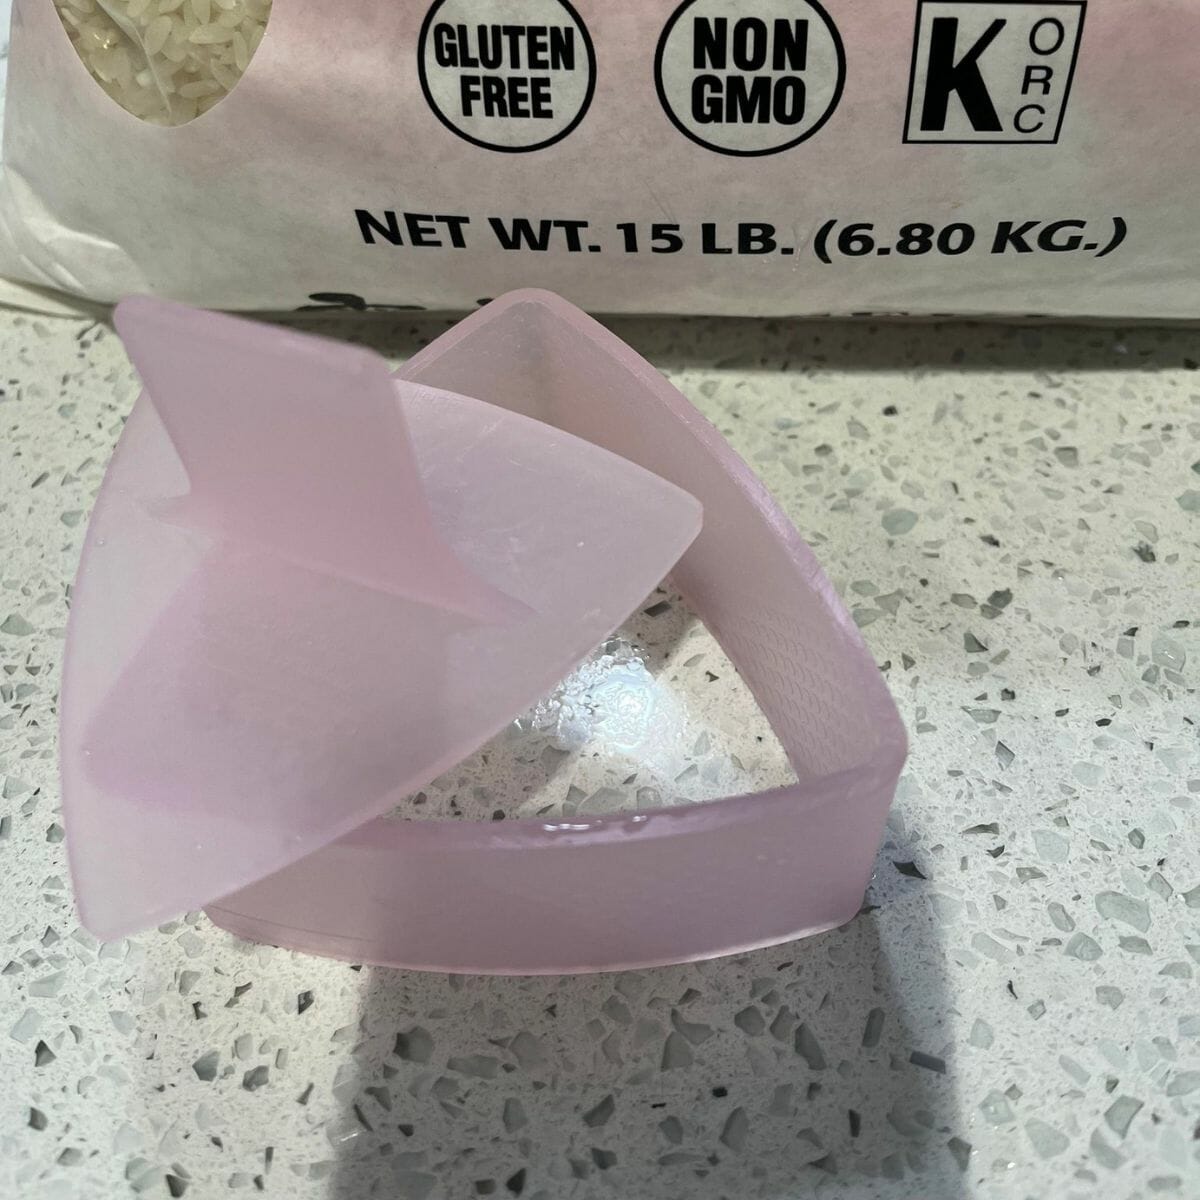
Onigiri Mold
Onigiri Ingredients
To make onigiri, these are the things you would need:
- Sushi rice
- some filling, typically cooked meats such as salmon, beef, or spam (more on this below)
- seaweed sheets
- optional Furikake (on Amazon) topping
- onigiri mold (we’ll show you how to make it by hand if you don’t want to buy one)
Onigiri Seaweed Wrapper and Mold 2-in-1 (on Amazon)
 Buy Now →
 (on Amazon)
Let’s talk about each of these ingredients in detail:
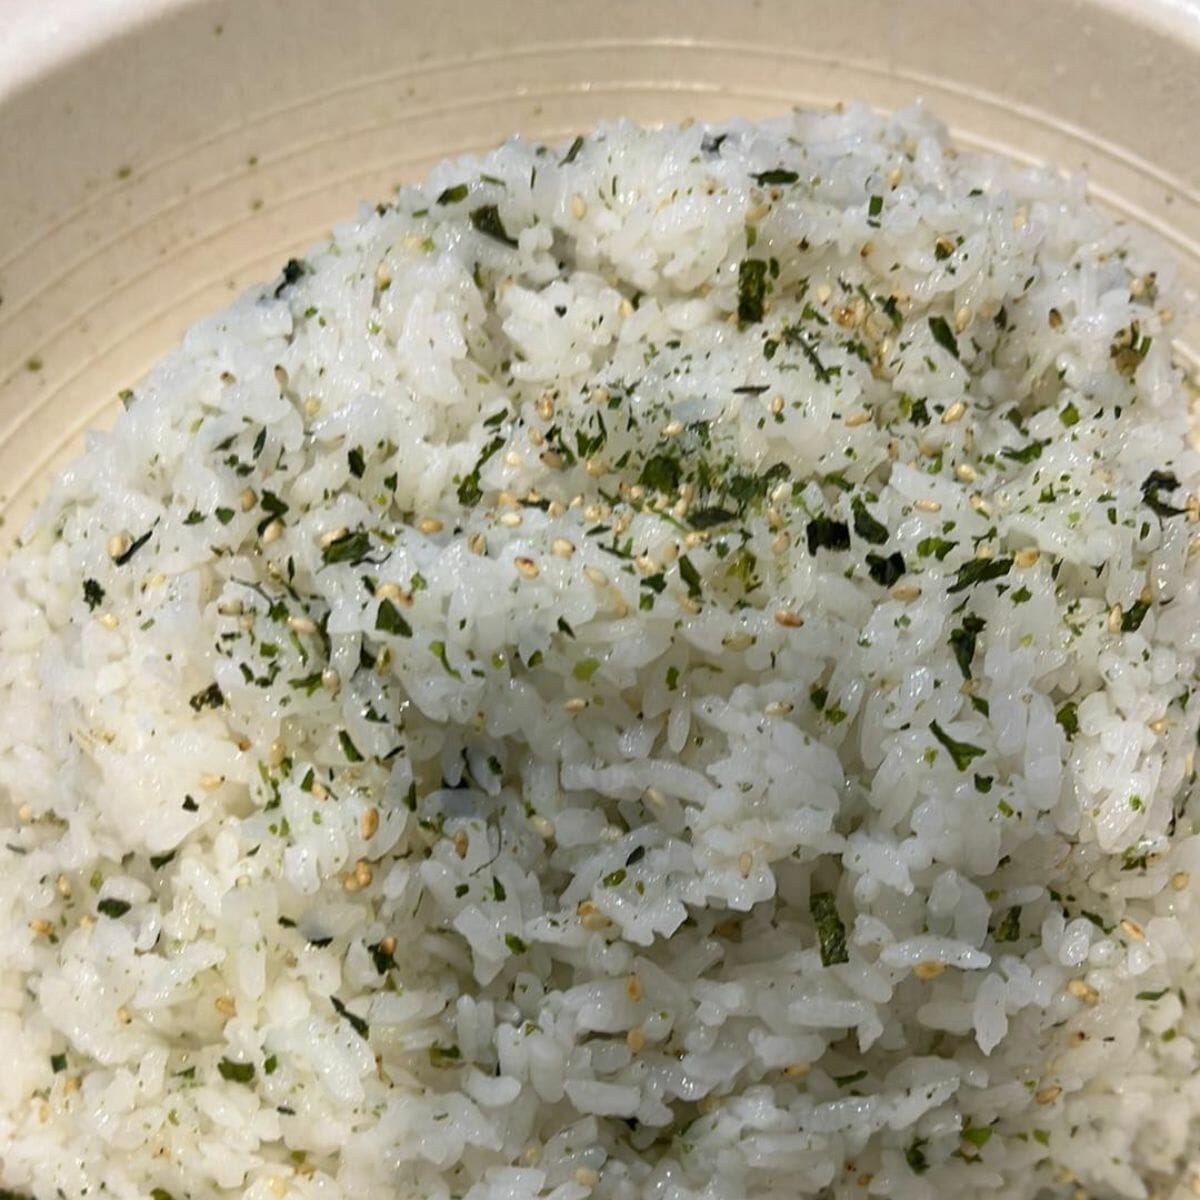
1. Sushi rice
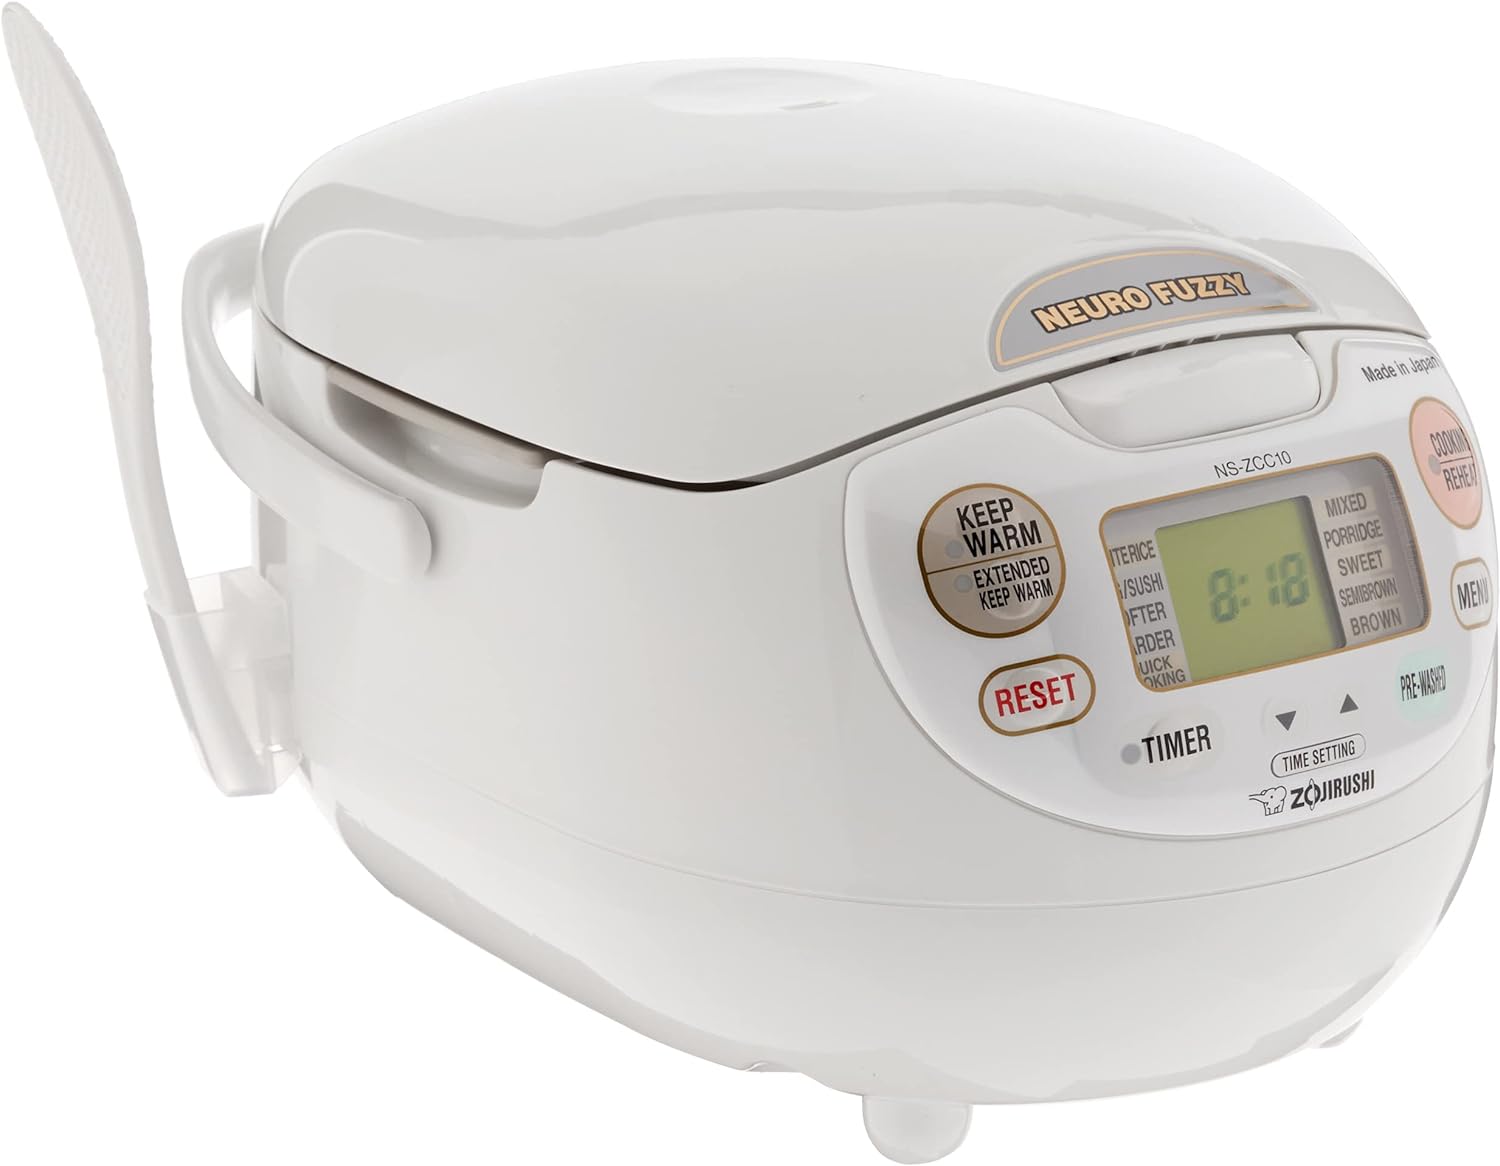
Making the perfect sushi rice is an art, in and of itself. Typically you would cook it according to package directions, immediately cool it with a fan and add rice vinegar seasoned with sugar and salt. More about how to cook perfect sushi rice down below. Alternatively, see our other article on the best sushi rice cooker to get the most perfect sushi rice everytime.
2. Nori seaweed
Nori seaweed is an edible seaweed that is used for making sushi – typically you would find them as sheets of nori a little bit smaller than a regular sized printing paper. To make onigiri, though – especially if you aren’t eating it immediately, you might need a special type of nori sheets that is already perfectly sized for onigiri, and is individually wrapped in plastic.
If you’ve eat old sushi before you might recognize that the seaweed tastes different than fresh sushi. Once it gets exposed to moisture its texture changes.
With a Onigiri wrap, they are individually wrapped ahead of time to keep the shape – and one would remove the plastic and wrap the onigiri immediately before enjoying (it’s very quick!)
3. Filling
Choose your favorite filling (more ideas on fillings later, see below). Onigiri is most commonly made with cooked and seasoned salmon on the inside, however you can use anything you like that goes well with sushi rice – which is pretty much anything you would have at inside your sushi! At some milk tea bars in Chinatown around my area, at TeaDo in Boston they serve it with spam on the inside (it’s actually quite delicious!)
4. (optional) Furikake
Furikake (on Amazon) is a Japanese seasoning mix that can be added to onigiri (rice balls) for extra flavouring. It comes in a variety of flavours, such as salmon, katsuobushi and egg. There are also vegan versions available that just contain dried vegetables. Furikake (on Amazon) can be purchased ready-made or made at home from ingredients such as seaweed, sesame seeds, bonito flakes and other seasonings.
This is optional and if you don’t know where to get it don’t worry about it – I’ve made onigiri with and without them – it does not take away from the taste much! But if you would like to try it, here is my favorite one: Furikake.
What is a onigiri seaweed wrapper, and do you need one?
If you’re going to eat all of your onigiri right away, or you’re making a bunch to serve at a party or something, I’d say no.
However, if you’re making onigiri as a lunch or grab-and-go kind of snack, you’ll definitely want onigiri seaweed wrapper. It is basically a pre-cut piece of nori seaweed that is perfectly sized to wrap your onigiri. This nori is further individually wrapped in plastic – typically with some fun images, icons, or text – I saw one on Amazon with Minions on it!
The reason for the plastic wrap, is it keeps the nori crispy. This is the most important reason why you’d need these.
When you are ready to enjoy your onigiri, you would unwrap it – take off the plastic – and rewrap it. No worries, we have pictures to show you how to do all of this down below.
Seaweed is crispy when first opened but quickly turns soggy when it is in contact with moisture from the rice. I don’t know if you like that kind of thing, but I prefer my nori crispy not soggy!
Okay, now that you have all the ingredients and materials needed, let’s start by cooking the sushi rice.
Step 1 – Cook the sushi rice
To make sushi rice, first soak it in water for at least 30 minutes prior to using
Then, rinse the rice under cold (not hot!) water and dumped it out to get rid of any excess starch – repeat this at least twice.
Cook according to package directions – keep in mind that if you use a rice cooker it would typically come with its own “cup” and that cup is not the same measurements as the standard American cup!!!
Cook the rice, via rice cooker or stovetop method.
Once rice is cooked, add seasoned rice vinegar and gently mix in. Do not be too aggressive with this otherwise the rice will turn mushy.
Note: some rice cooker wants you to “wait 15 minutes” after rice is cooked before using. If this is what it says I would definitely wait. Some rice cookers you can use it immediately.
(Optional) Mix in furikake gently and use rice immediately while still hot. It sticks better when it’s hot!
Note: if you’ve made sushi rice to make sushi before, you might have let the rice cool before using. That is great for sushi, but not for onigiri! It is best to use it while it’s still hot.
If you don’t have seasoned rice vinegar it is easy to prepare with some sugar and salt: on a small saucepan, combine 1/3 cup rice vinegar (unseasoned) and stir in 3 tablespoons sugar and 1 and 1/2 teaspoon kosher salt. Bring to a boil and immediately turn off once sugar is completely melted. Let cool completely.
Step 2: Choose your filling
We have a dedicated onigiri recipe with cooked salmon that you will enjoy! It is made with a salmon filet seasoned with a made-from-scratch teriyaki glaze. If you’re looking for other ideas for your onigiri, read on.
Oh my, where to start? Let’s just say that anything that tastes good with rice and can be chopped up will be good here! Let’s look at some authentic Japanese fillings, as well as ideas more suitable for an average American kitchen!
Authentic Japanese filling ideas:
- Umeboshi – a type of pickled plum that is sour and slightly salty in flavor.
- Tarako – salted salmon roe that is creamy and rich in flavor.
- Takana – pickled mustard greens that are tangy and slightly spicy.
- Kamaboko – a type of fish cake that is made from white fish and has a slightly sweet flavor.
- Konnyaku – a type of jelly made from the konjac plant that has a chewy texture and a mild flavor.
- Okaka – bonito flakes mixed with soy sauce and sake, giving it a savory and slightly smoky flavor.
- Takuan – pickled yellow daikon radish that has a sweet and tangy flavor.
- Inarizushi – a type of sushi that uses a pouch of deep-fried tofu as the outer layer, and is filled with vinegared rice and other ingredients.
Popular filling ideas more suitable for an average American kitchen:
- Tuna salad
- Chicken salad
- Egg salad
- Teriyaki chicken, cut into small pieces
- Leftover shredded pork, beef, brisket, bbq meats, or chicken
- Ground beef, chicken, or pork, cooked and seasoned.
- Diced cheddar cheese
- Spam, diced.
Step 3 – How to make the onigiri using a mold
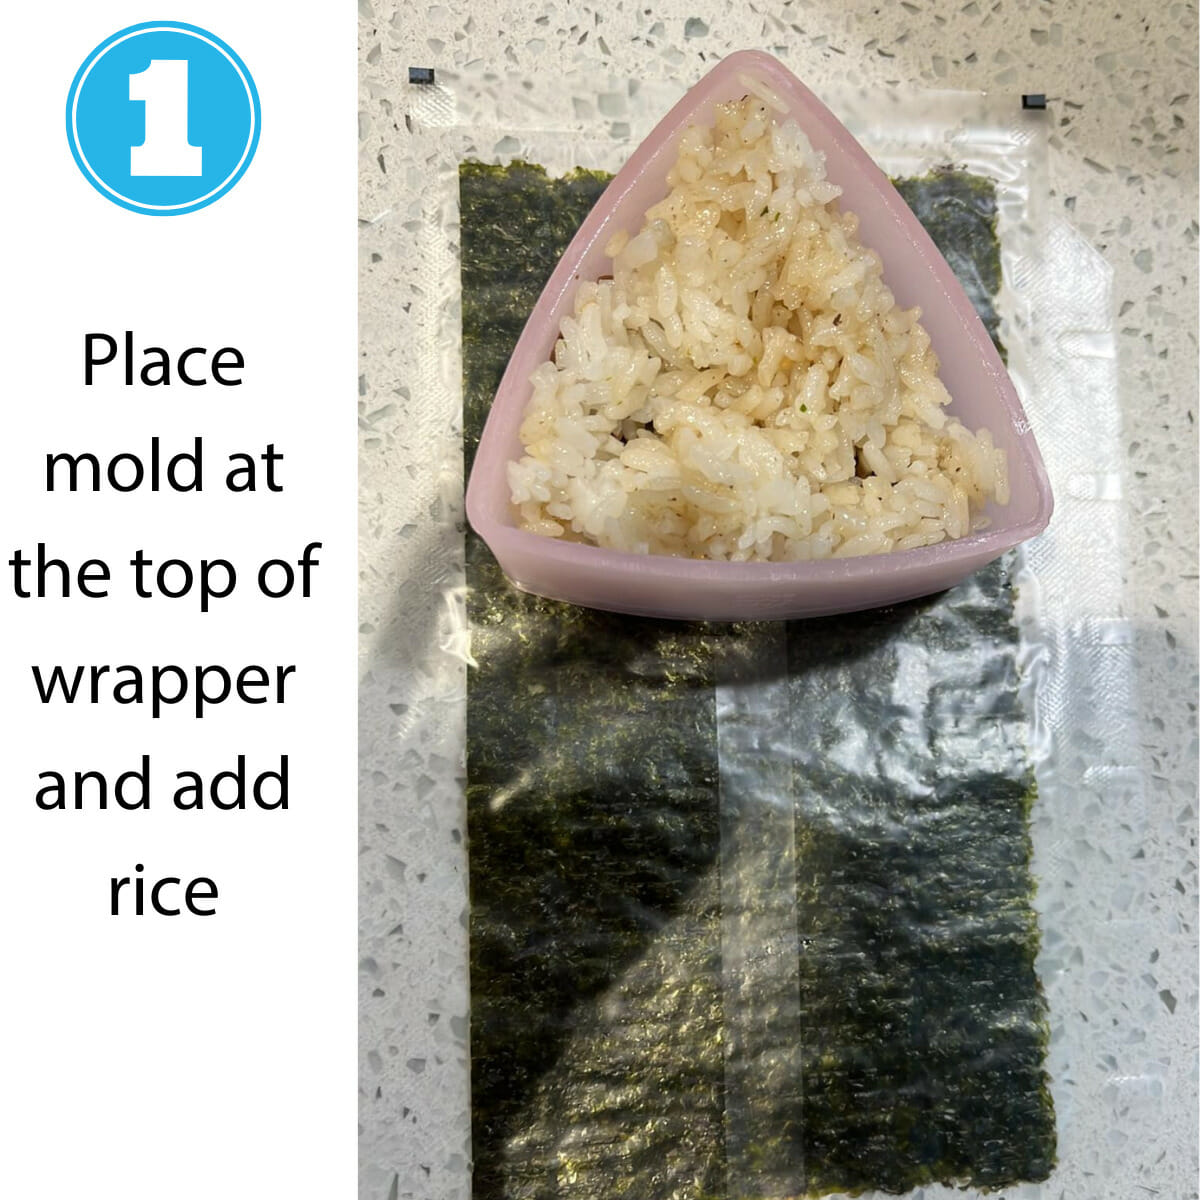
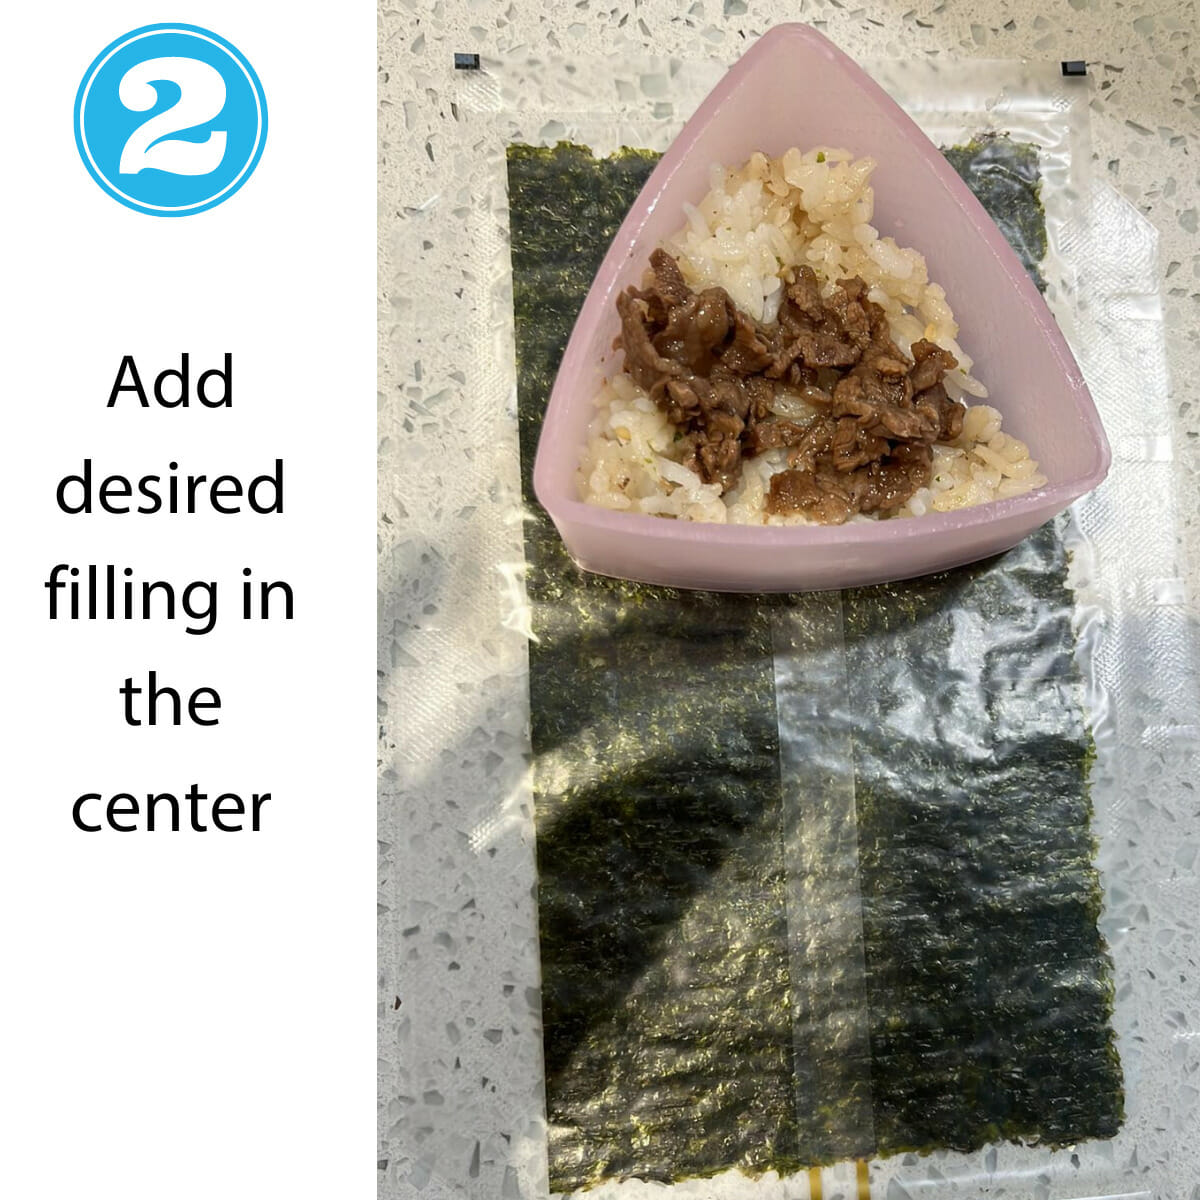
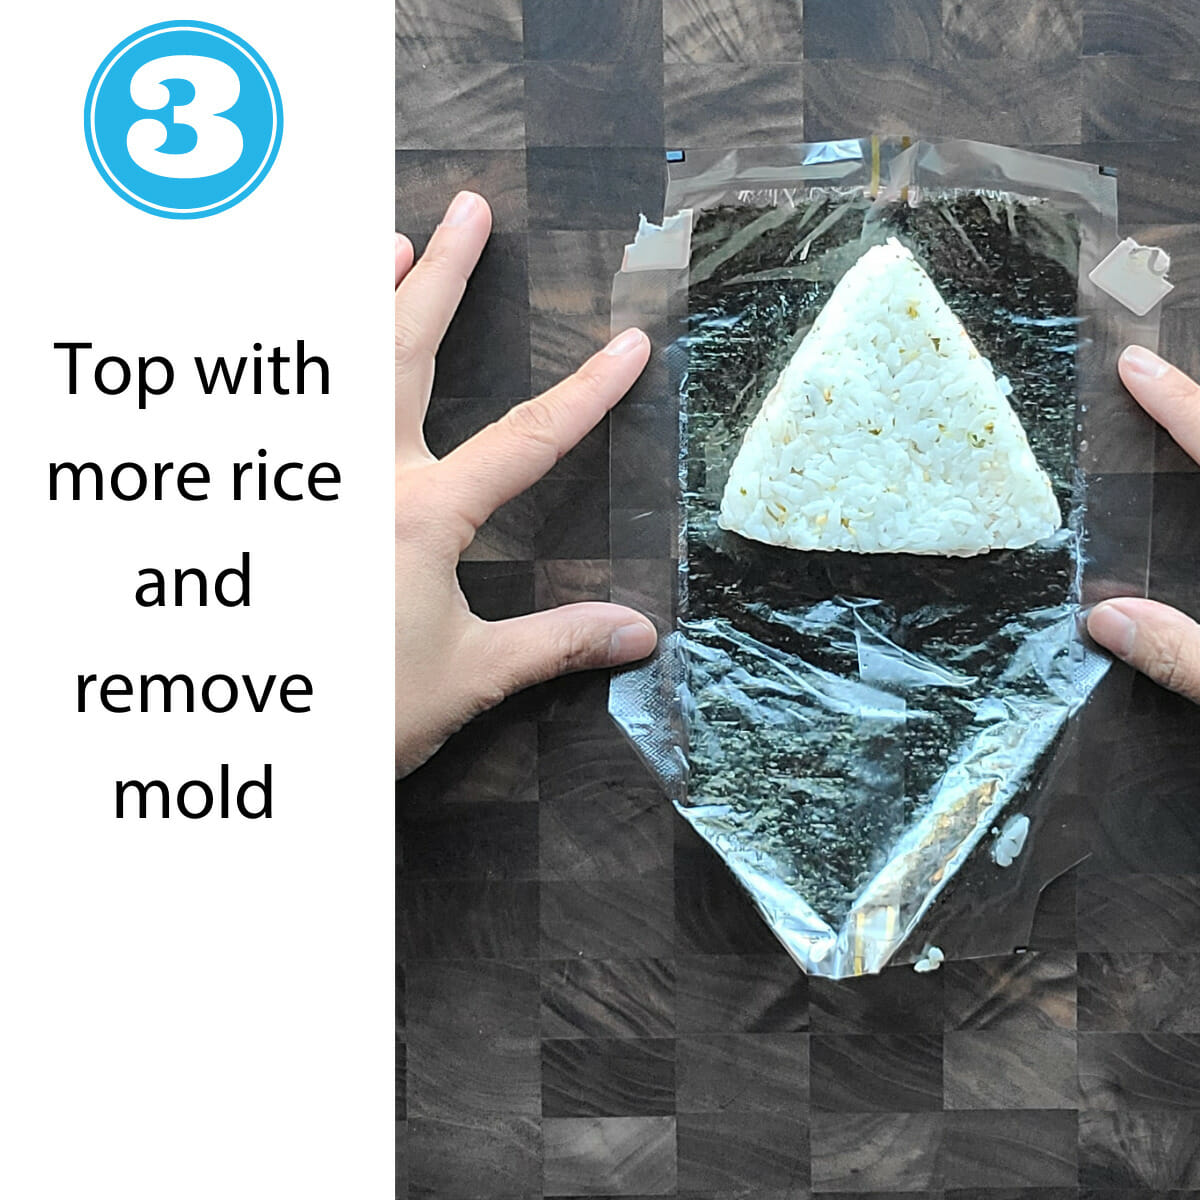
Tip: The filling should be centered, leaving the edges so the top layer of the rice can stick to the bottom layer of the rice. Make sure you leave enough room! Once done, if your sushi mold comes with a tampering press down gently. If you don’t have one just use your middle four fingers and press down gently.
Step 3(b) – How to make onigiri by hand with no mold


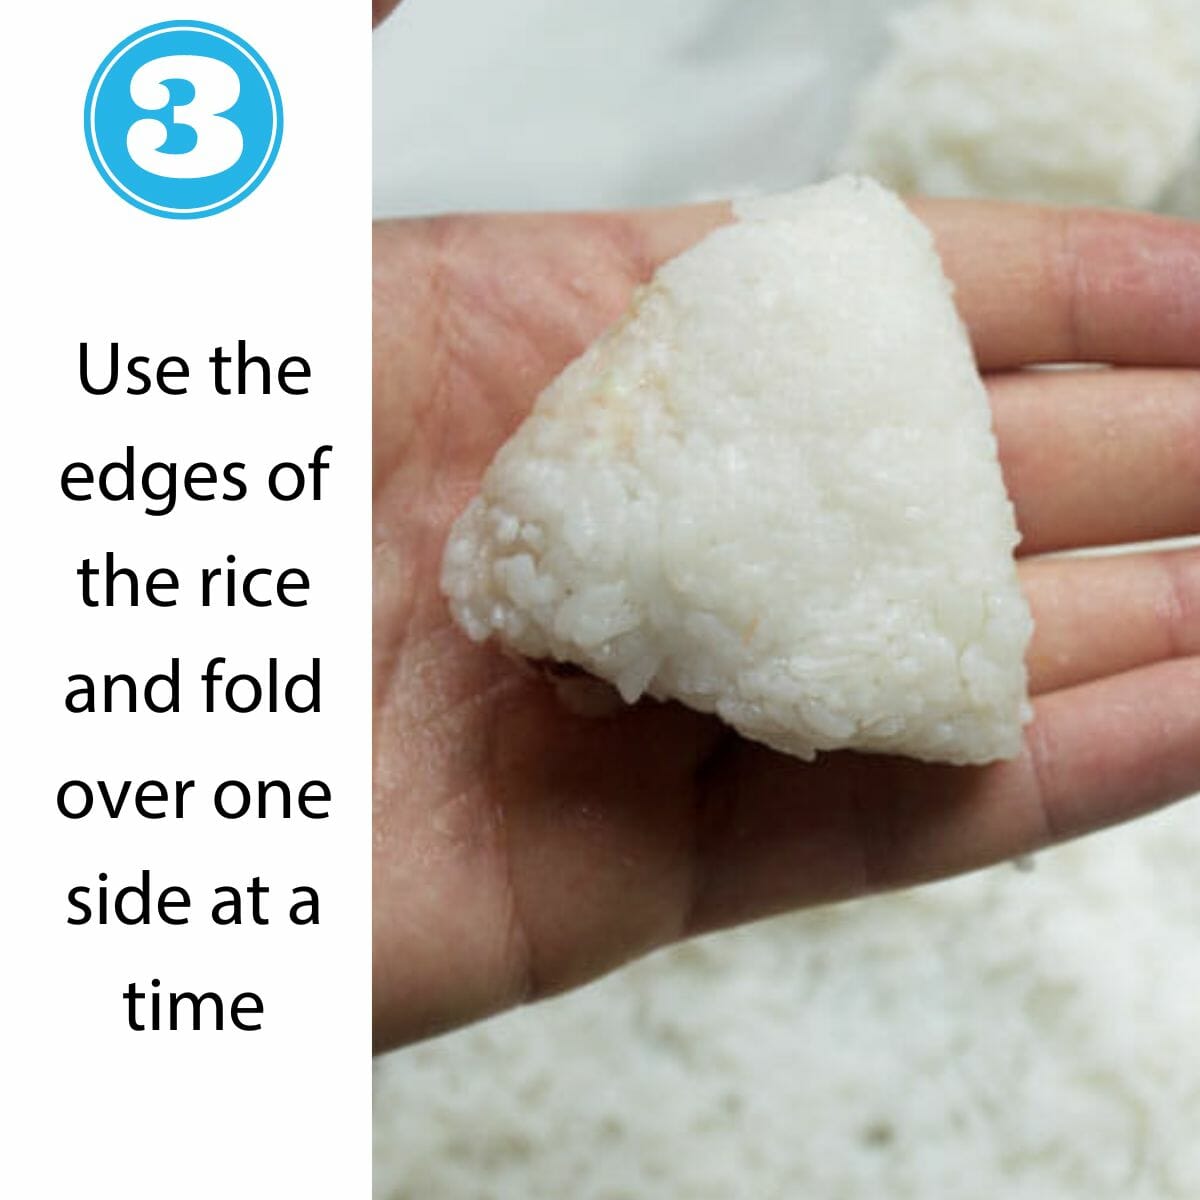
PRO TIP: Wet your hands before you get started – if the rice is too hot for you to work with let it cool a little longer, but don’t let it cool too much, because the rice sticks together better when it’s slightly hot.
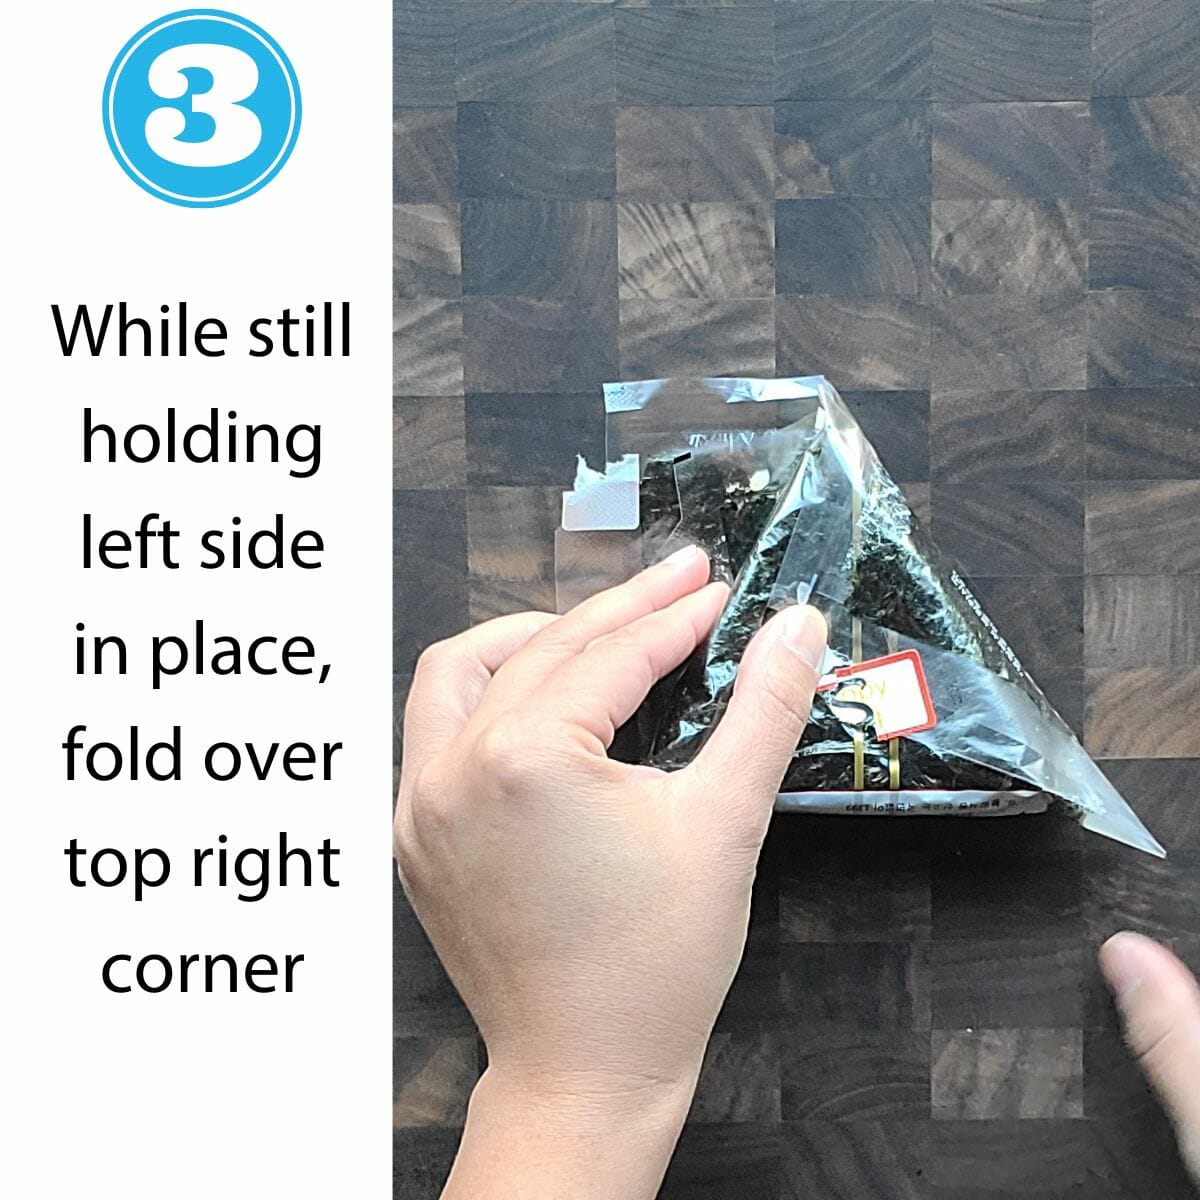
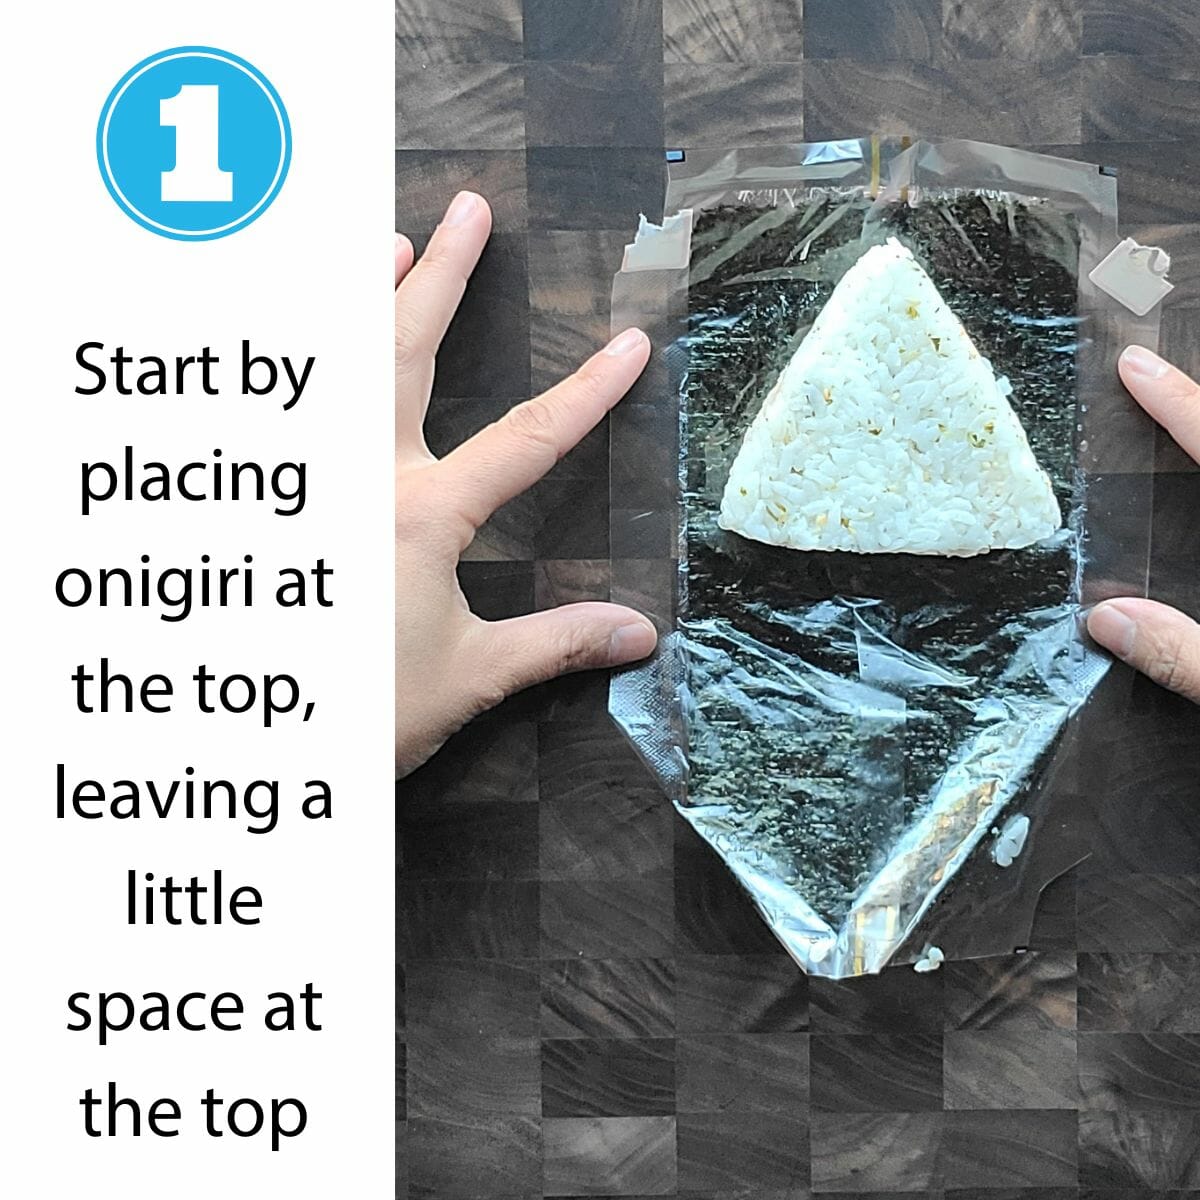
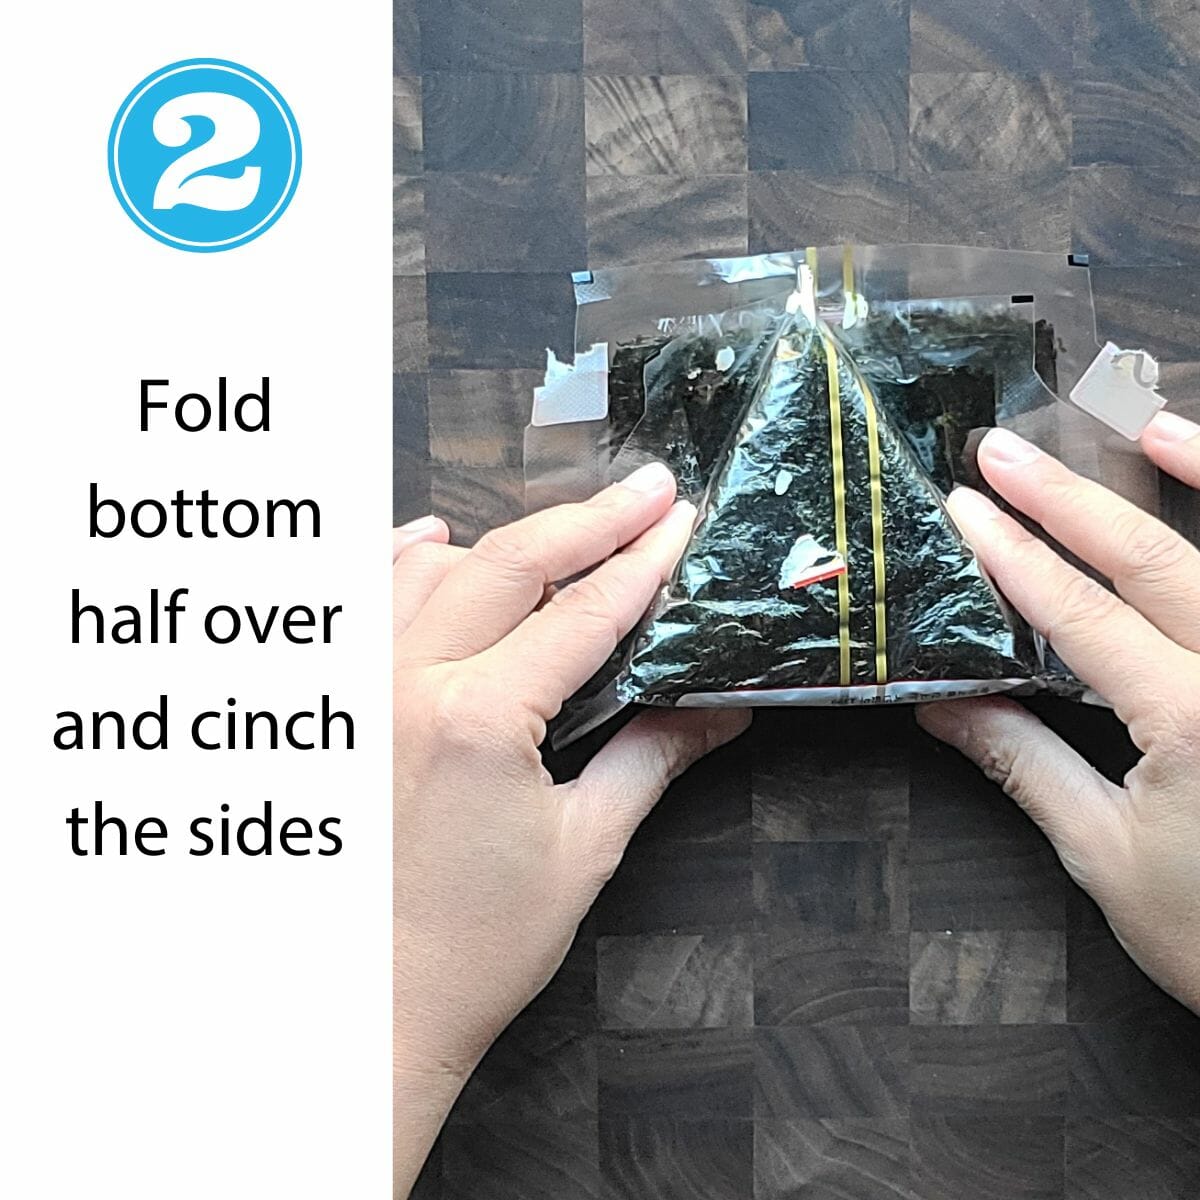
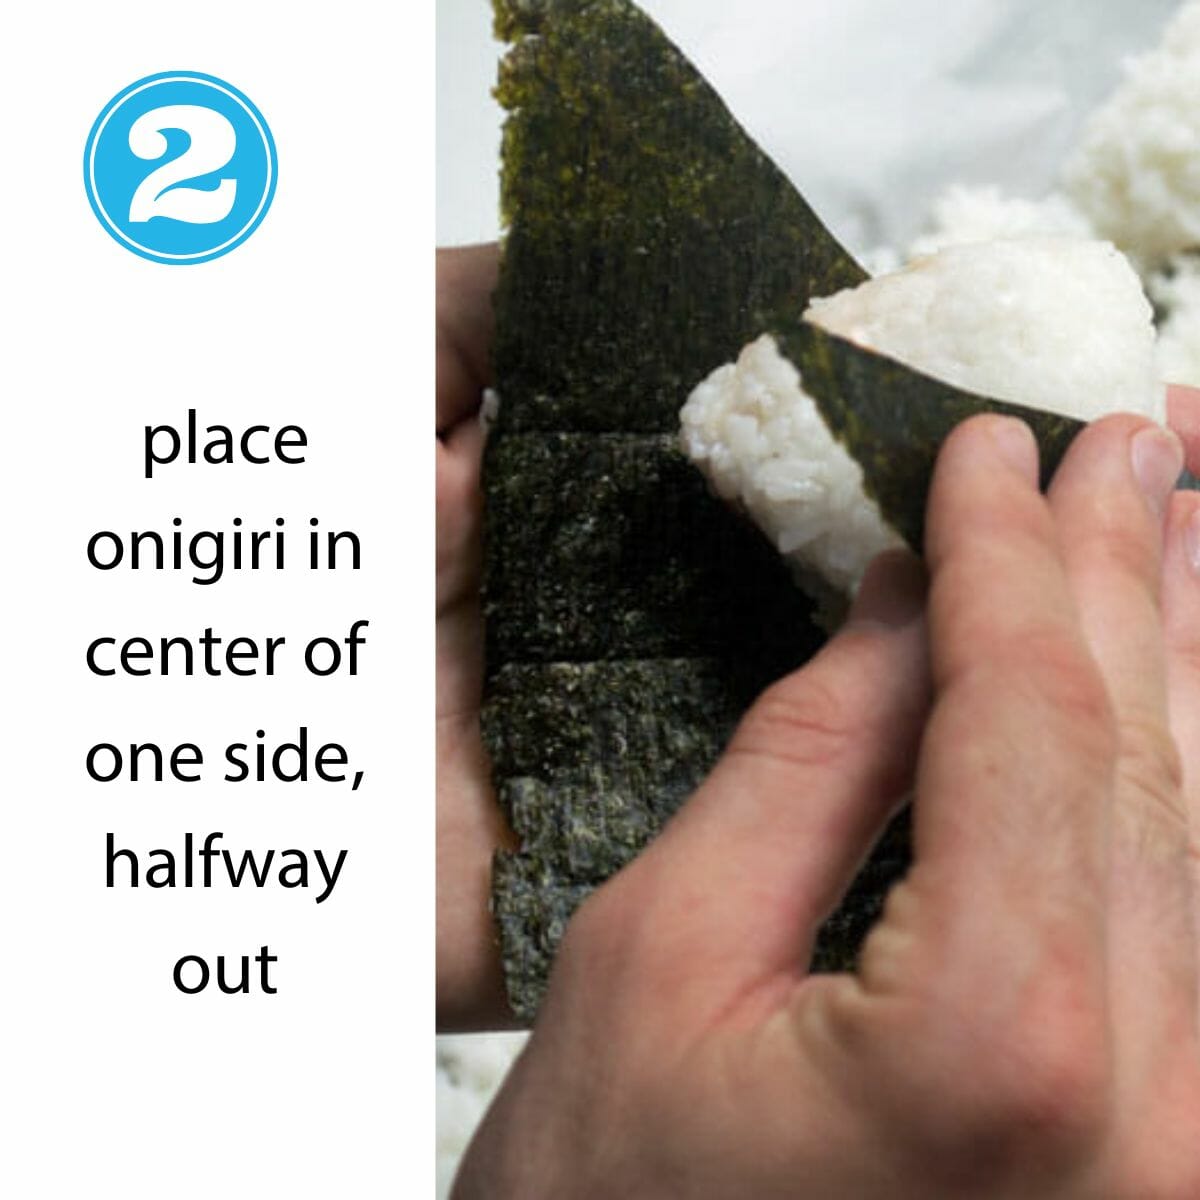
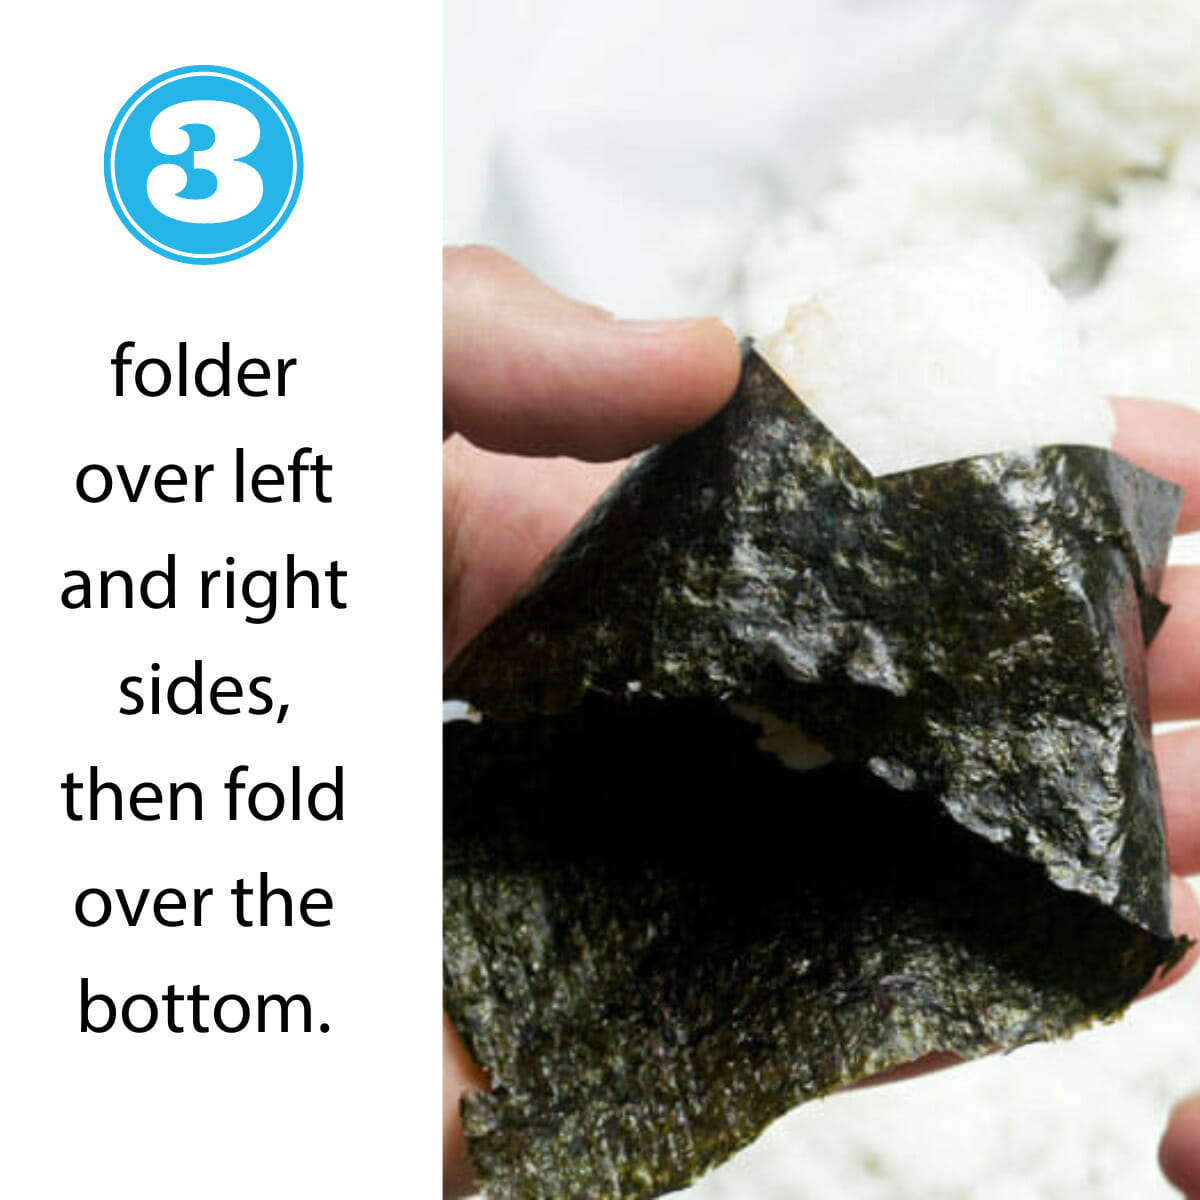
Step 4: How to wrap onigiri

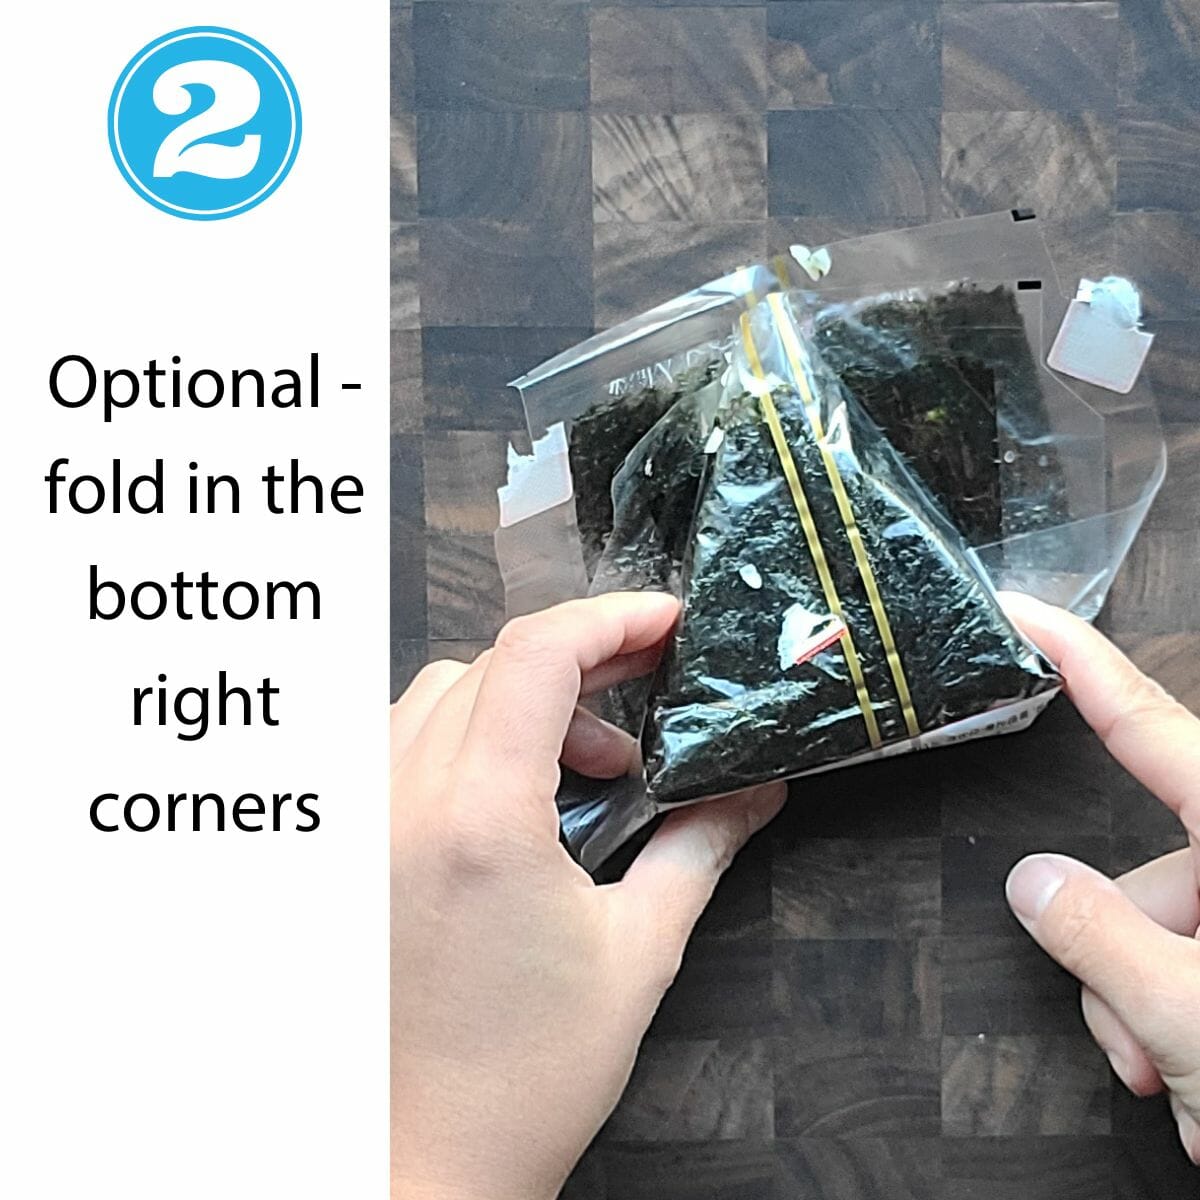
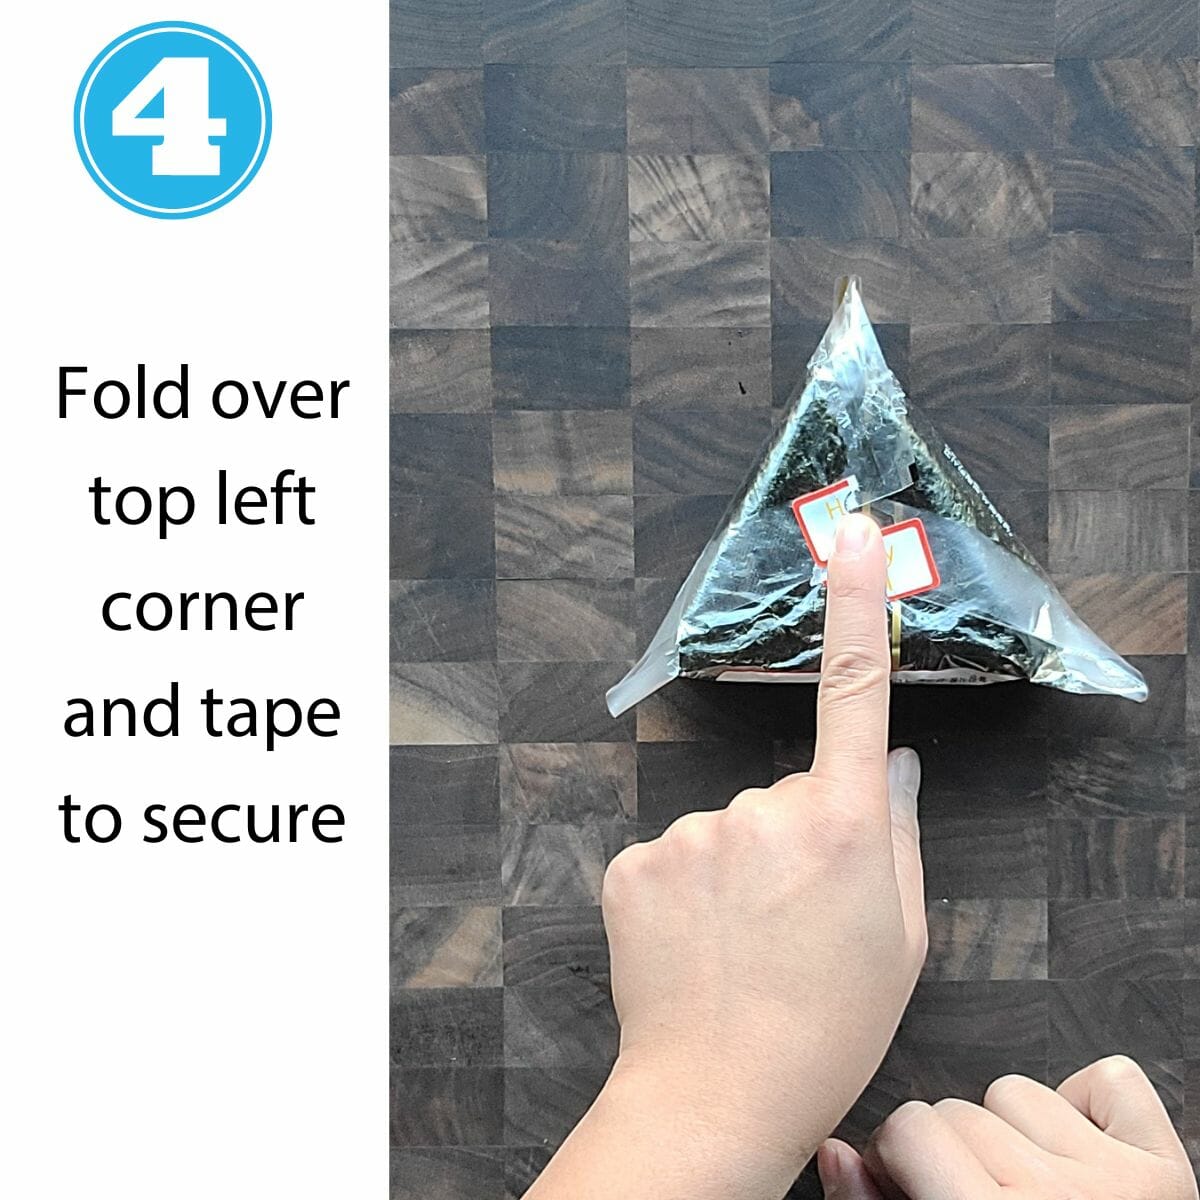
PRO TIP: I find that step 2 (folding in the corners) isn’t really necessary, it just takes longer and makes it slightly harder to have to hold the shape. Skip it, it’ll look just fine!
This is my favorite onirigi wrapper and mold
Buy Now → (on Amazon)
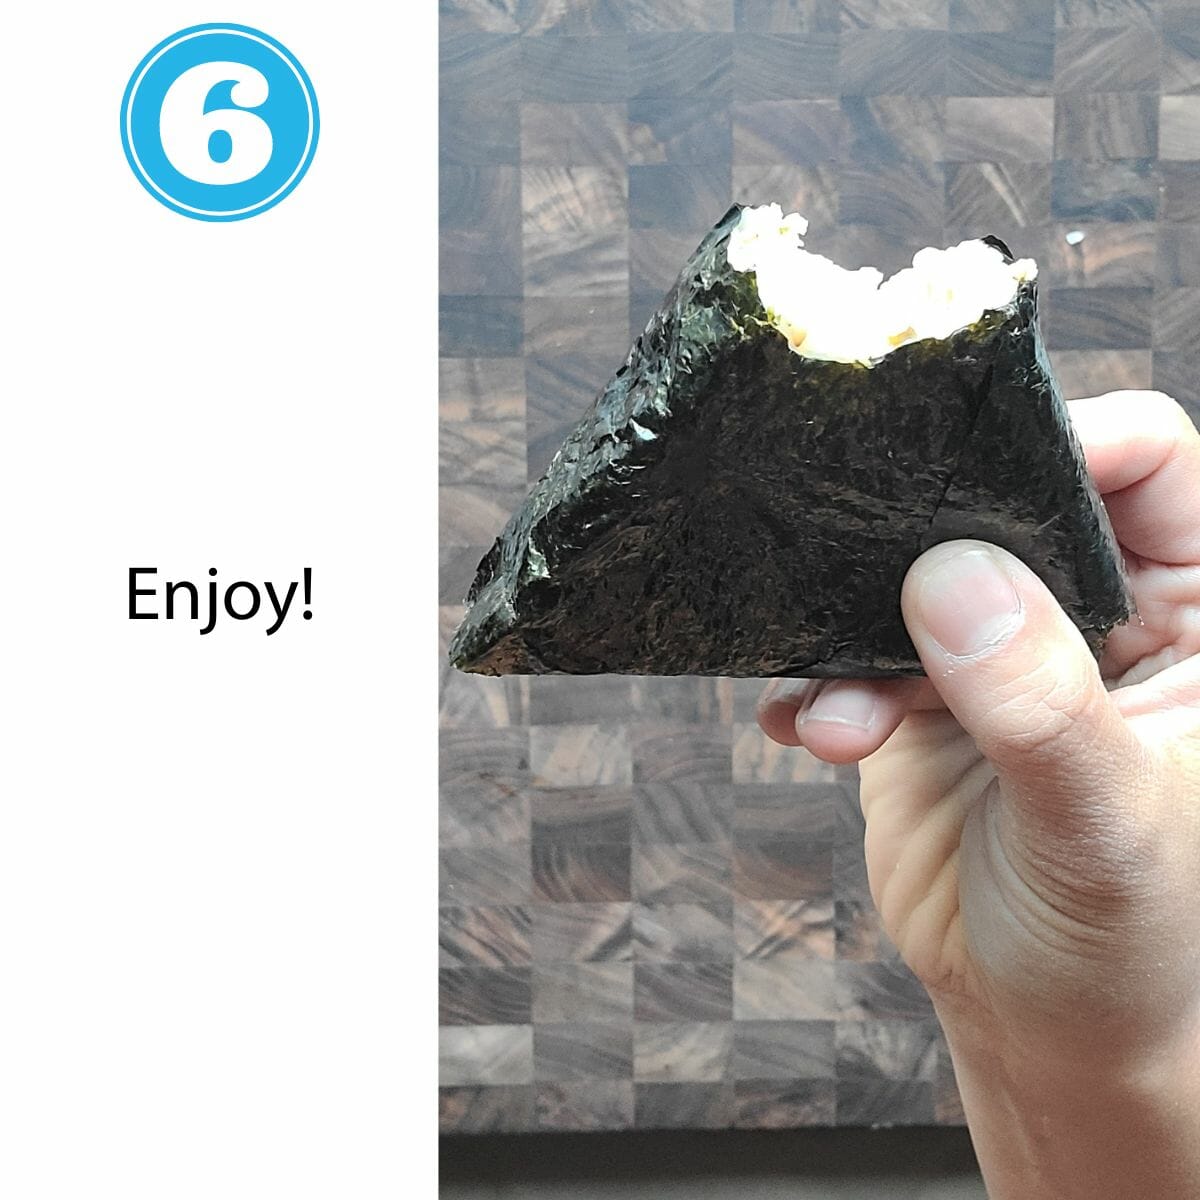
Step 5 – To Eat – This is the fun part!


Onigiri vs. musubi
Okay, now that we’re done talking about how to make onigiri – it sounds eerily similar to a musubi. So, what’s the difference?
Although both onigiri and musubi are Japanese rice balls, they differ in a few ways. Onigiri usually has a savory filling like cooked tuna, cooked salmon, or pickled plums placed inside the rice itself.
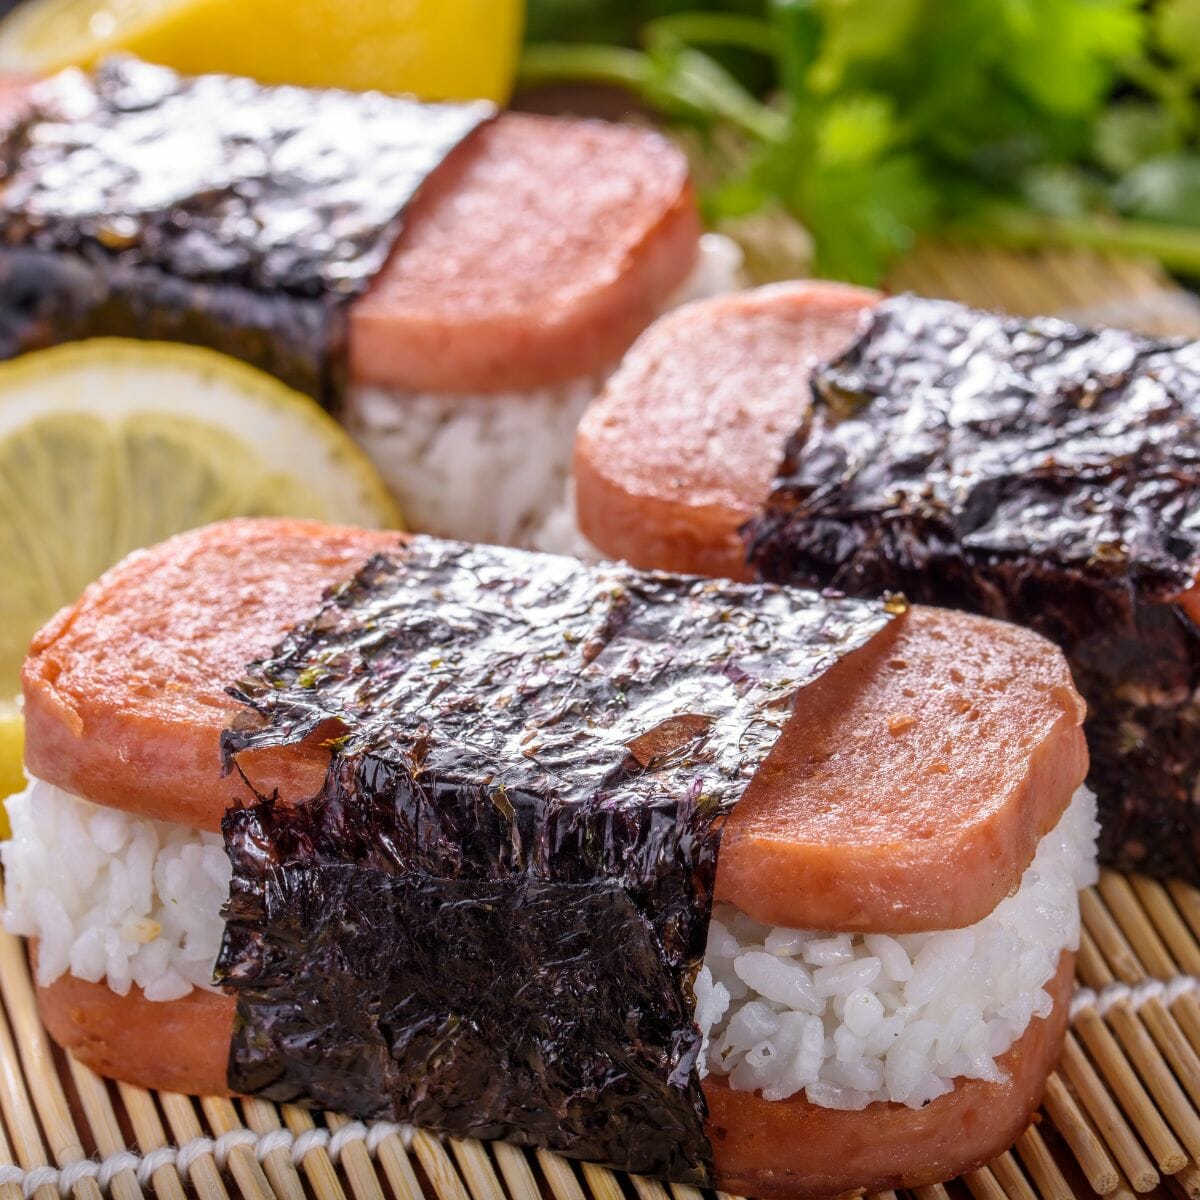
On the other hand, for musubi, it is a little bit more modern and is popular in Hawaii. Instead of having a filling on the inside, it frequently has a topping instead (the meat sits on top), and instead of sushi or tuna, it is more frequently spam or a fried egg. Celebrity chef Alan Wong is known to serve musubi with spam at his exclusive restaurant!
Onigiri is also more of a grab-and-go, and can be found at convenience stores in Japan whereas musubi is more for a dinner table.
Also, according to my sister, who is a real foodie – she says that musubi is also “soggy and gross seaweed” due to its preparation lacking the plastic wrap that is found in onigiri. The seaweed, when exposed to the rice and spam, gets soggy pretty quickly from the moisture, and by the time it is served to you, you’re basically “eating soggy seaweed.”
Onigiri vs. nigiri
Is onigiri just nigiri without the letter “O” ?
Just kidding.
Onigiri and nigiri are both types of Japanese rice served with some kind of meat, but they are different in a few ways. Onigiri is typically filled with like cooked salmon, cooked beef, or cooked tuna, and is served as a handheld.
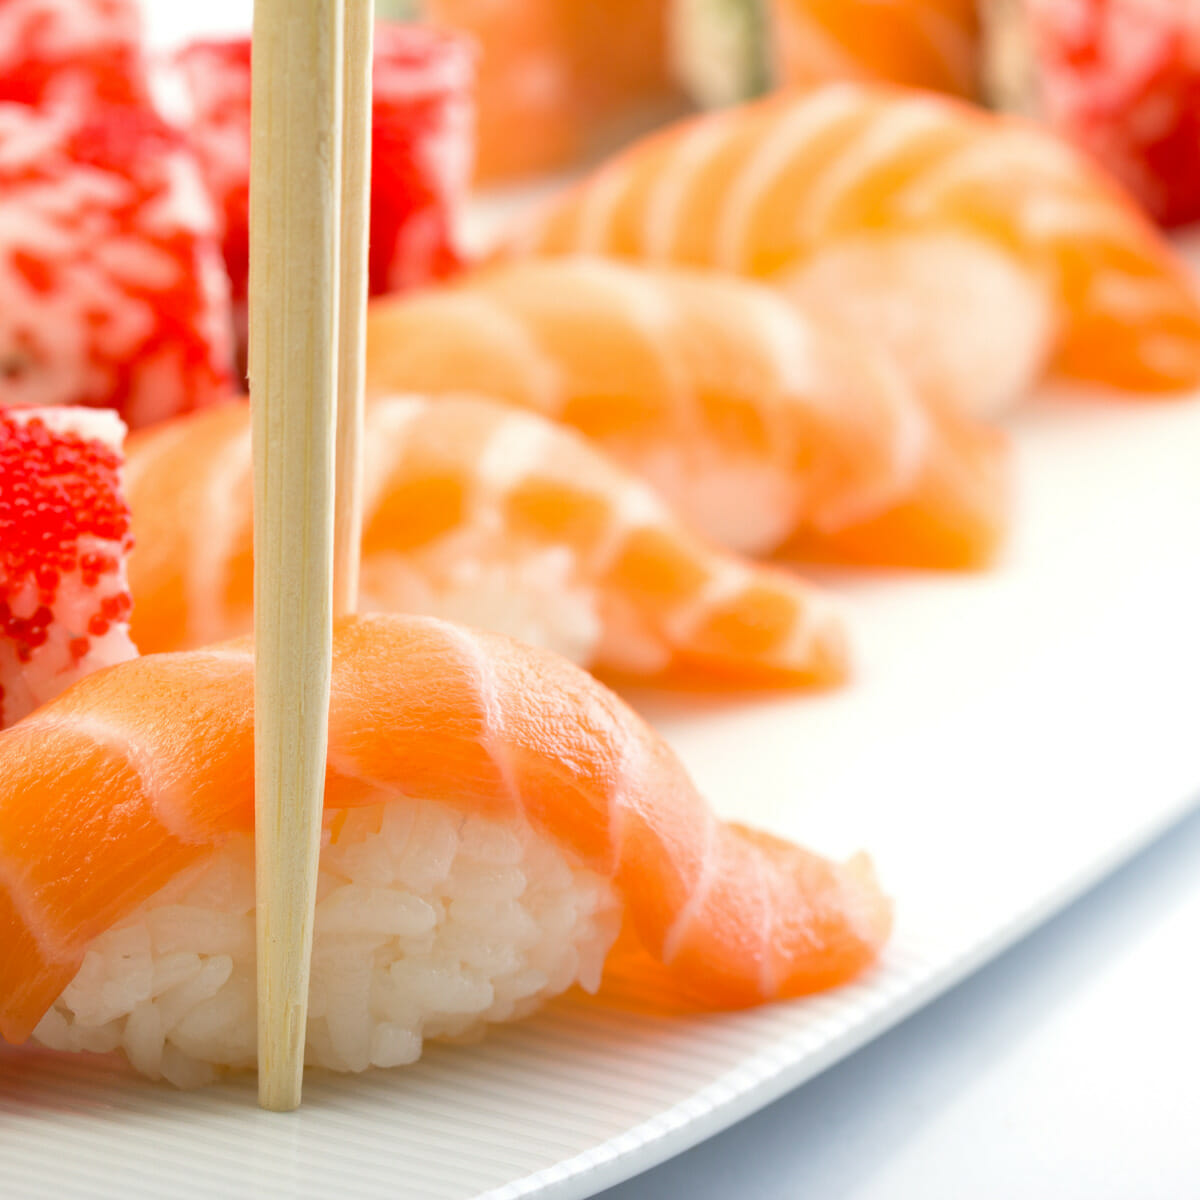
Nigiri, on the other hand, is a type of sushi that is made with a small, oval-shaped sushi rice ball topped with raw seafood such as salmon, tuna, eel, mackerel, or other raw (sometimes cooked) seafood commonly found at sushi restaurants. It is served with a side of soy sauce, wasabi, pickled ginger, and typically eaten using chopsticks.
Another difference is that onigiri is often associated with traditional Japanese cuisine, while nigiri is a more modern food that is closely associated with sushi.
FAQs
What are the different types of onigiri?
Onigiri comes in many shapes and sizes, including triangular, cylindrical and round. It is a type of rice ball that contains different fillings, which can be either salty or sweet. Onigiri is a popular snack and lunch food in Japan, and it can be found in convenience stores as well as grocery stores around the country. Unlike sushi, onigiri uses plain steamed rice seasoned with salt, sugar and vinegar instead of sushi rice.
How long do onigiri last?
Onigiri can last up to 3 months if stored in the freezer. To serve onigiri, they should be thawed overnight in the refrigerator and then microwaved for 30-45 seconds to refresh them. Preparing onigiri ahead of time is also an option, as they can be stored in the fridge for up to 3 days.
5 Tips for Making Perfect Onigiri
1. Use freshly cooked rice
Using freshly cooked rice is important when making onigiri because it will hold its shape better than cold or dry rice. Additionally, freshly cooked rice will provide a greater range of textures and flavors to the onigiri compared to using cold or dry rice. Freshly cooked rice also prevents the onigiri from becoming too wet, which can cause it to become soggy and lose its shape.
2. Wet and salt your hands
It is important to wet and salt one’s hands before making onigiri as this prevents the rice from sticking to the hands while forming it. Furthermore, salting helps give onigiri its flavor and also helps preserve it.
3. Give just enough pressure
It is important to give just enough pressure when making onigiri in order to ensure that the rice does not become too dense or stick together. If the rice becomes too compressed, it will be difficult to shape into a desired shape and might lead to clumps or a misshapen onigiri. Rotating the balls of rice while pressing down can help prevent this from happening.
4. Identify your rice ball with a filling
It is important for people to identify their onigiri with a filling so that they can enjoy the perfect combination of ingredients that are contained within the rice ball. Additionally, it helps to ensure that the filling will stay in place and not come out while eating.
5. Wrap the nori before you eat
It is important to wrap the nori before eating onigiri in order to keep it fresh and prevent the rice from sticking to your fingers. The nori will also add an extra layer of flavor and crunch, making it a more enjoyable experience.
What type of rice is used for Onigiri?
Onigiri is a Japanese snack typically made with Japanese Short Grain Rice, as it is sticky and helps the onigiri to hold its shape. It is important to wet your hands before preparing the rice, as this will make it more sticky.
Additionally, using warm rice instead of cold can also help it keep its shape better. You can substitute a premium Japanese brand short grain rice in place of rice marketed as “sushi rice” to save on cost. Here’s what I used in this recipe, and it worked very well.
Cheaper alternative to “sushi rice” – this is what I used in this recipe and it worked wonders

Nishiki Premium Short Grain Rice
Buy Now →(on Amazon)
Is Onigiri the Same as Sushi?
Here we go!
Some people believe that onigiri is the same as sushi because both involve forming rice into a distinct shape and often include some type of filling. The difference between the two lies mostly in their shapes, with Onigiri usually being shaped into triangular or cylinder-shaped balls, while sushi is usually made into rolls or individual pieces.
Also, onigiri typically includes cooked food on the inside whereas sushi can have raw or cooked items.
Onigiri Shapes and Molds
Different shapes and molds can be used to make onigiri, such as basic triangles, animals and flowers. Onigiri molds are a great way to make onigiri for the first time, as they come in a variety of sizes and shapes. I would start with a triangular shape since those are most popular and most onigiri wrappers are made for this shape – then you can venture out into fun shapes are you get more comfortable with making onigiri.
Sushi rice is expensive, can I substitute?
Yes! Although I wouldn’t recommend substituting it with brown rice, or jasmine rice, or mexican rice, there are better options. I find that when I buy u0022premium riceu0022 instead, that is made by a Japanese brand and is short grain rice, it achieves the same result – and it’s about half the price!u003cbru003eu003cbru003eThis one here is my favorite: Nishiki Premium Short Grain Rice
Is Onigiri eaten hot or cold?
Both! When you first finish it, it’s still nice and warm – eat it right away! My sister made me a batch last time and instructed me to keep in the fridge but microwave just the rice (not the wrapper or nori seaweed) just before eating.u003cbru003eu003cbru003eHowever, my 10 and 11 year old sons enjoy it right out of the fridge with no problem, and they even brought it to school as a snack. Eat it cold, eat it hot, eat it room temperature – they taste good no matter what.u003cbru003eu003cbru003eIt makes sense, if you think about it – we eat refrigerated sushi at the grocery store all the time. When we eat it at a restaurant, we’re basically eating it room temperature.

How to Make Onigiri – Spam, Tuna Mayo, or Salmon
- Total Time: 25 minutes
- Yield: 12 1x
- Diet: Gluten Free
Description
The recipe is the same, but you can choose which filling you like best. This recipe makes about 12 onirigi.
Ingredients
For the Onigiri
- 12x Onigiri Wrapper (optional but highly recommended), or plain nori sheets.
- 2 cups uncooked Sushi Rice or Premium Japanese Short Grain Rice
- 1/2 cup Seasoned rice vinegar
- if you can’t find this, use plain rice vinegar, sugar, and salt. instructions below.
- optional furikake
Filling Choice 1: Spam
- 1 8oz container of spam, fully cooked, cubed
Filling Choice 2: Tuna Mayo
- 1/2 cup mayonnaise
- 1.5 tbsp sriracha (on Amazon)
- 2 tsp soy sauce, low sodium
- 2x 5oz canned tuna in oil, drained.
- 6 scallions, thinly sliced (dark and pale green parts only)
- lemon zest, finely grated, from 1 lemon
- 1 tsp kosher salt (use 1/2 tsp if using table salt such as Morton’s)
Filling Choice 3: Teriyaki Salmon
- 8oz salmon filet
- 1 tbsp honey
- 1 tbsp soy sauce
- 1 tsp garlic powder
- 1 tsp ground ginger powder
Instructions
Cook sushi rice
- Cook 2 cups of uncooked sushi rice or premium Japanese short grain rice according to package instructions.
- When rice is done, immediately add seasoned rice vinegar and optional furikake. Note: If you don’t have store-ready seasoned vinegar see instructions for Seasoned Rice Vinegar.
- Fold the rice vinegar into the sushi rice with a wooden paddle gently, you can make cutting patterns at a 45 degree angle. Don’t overdo this, it can make the rice mushy!
Seasoned Rice Vinegar
- In a small saucepan, combine 1/2 cup unseasoned rice wine vinegar, 1/4 cup white sugar, 1 teaspoon salt.
- Bring to a simmer, mix through, and immediately remove from heat. Let cool before use.
For Salmon Filling:
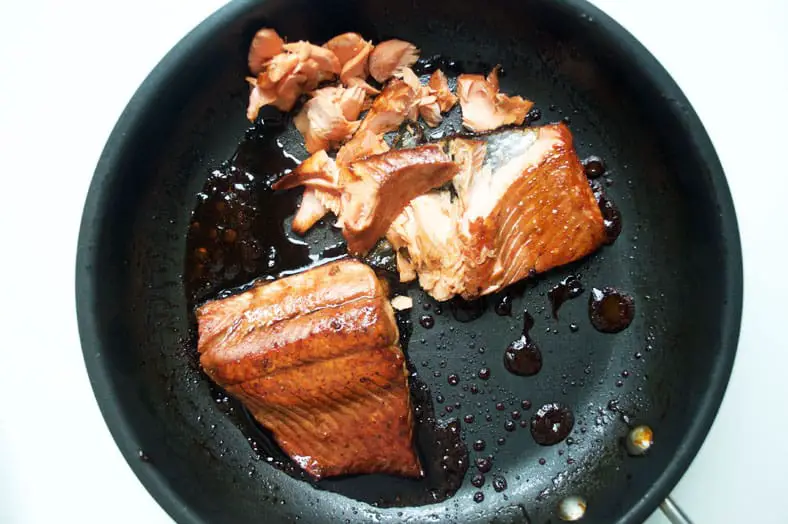
- In a small bowl, mix soy sauce, honey, water, garlic powder and ginger powder.
- Heat saucepan over medium-high heat and sear salmon. After 1 minute add the sauce from step 1.
- Sear salmon for a total of 3-4 minutes each side, or until no longer translucent.
- Flake and divide into 12 portions
For Spam Filling:

- Cut spam into 1/2 inch thick slices, you’ll need 2 slices to make 12 onigiri.
- Add 1 tablespoon of oil in small skillet over medium heat.
- Heat Spam for 3-4 minutes, flipping halfway through.
- Cut each slice into 6 parts, for a total of 12.
For Tuna Mayo or Spicy Tuna
- Combine scallions, lemon zest, tuna, mayonnaise, sriracha (on Amazon), and soy sauce in a medium mixing bowl and mix well with a fork.
- Divide into 12 portions for your 12 onigiri
How to Shape Onigiri by Hand with No Mold:
How to Shape Onigiri with a Mold:
Wrap the Onigiri with Onigiri Wrapper
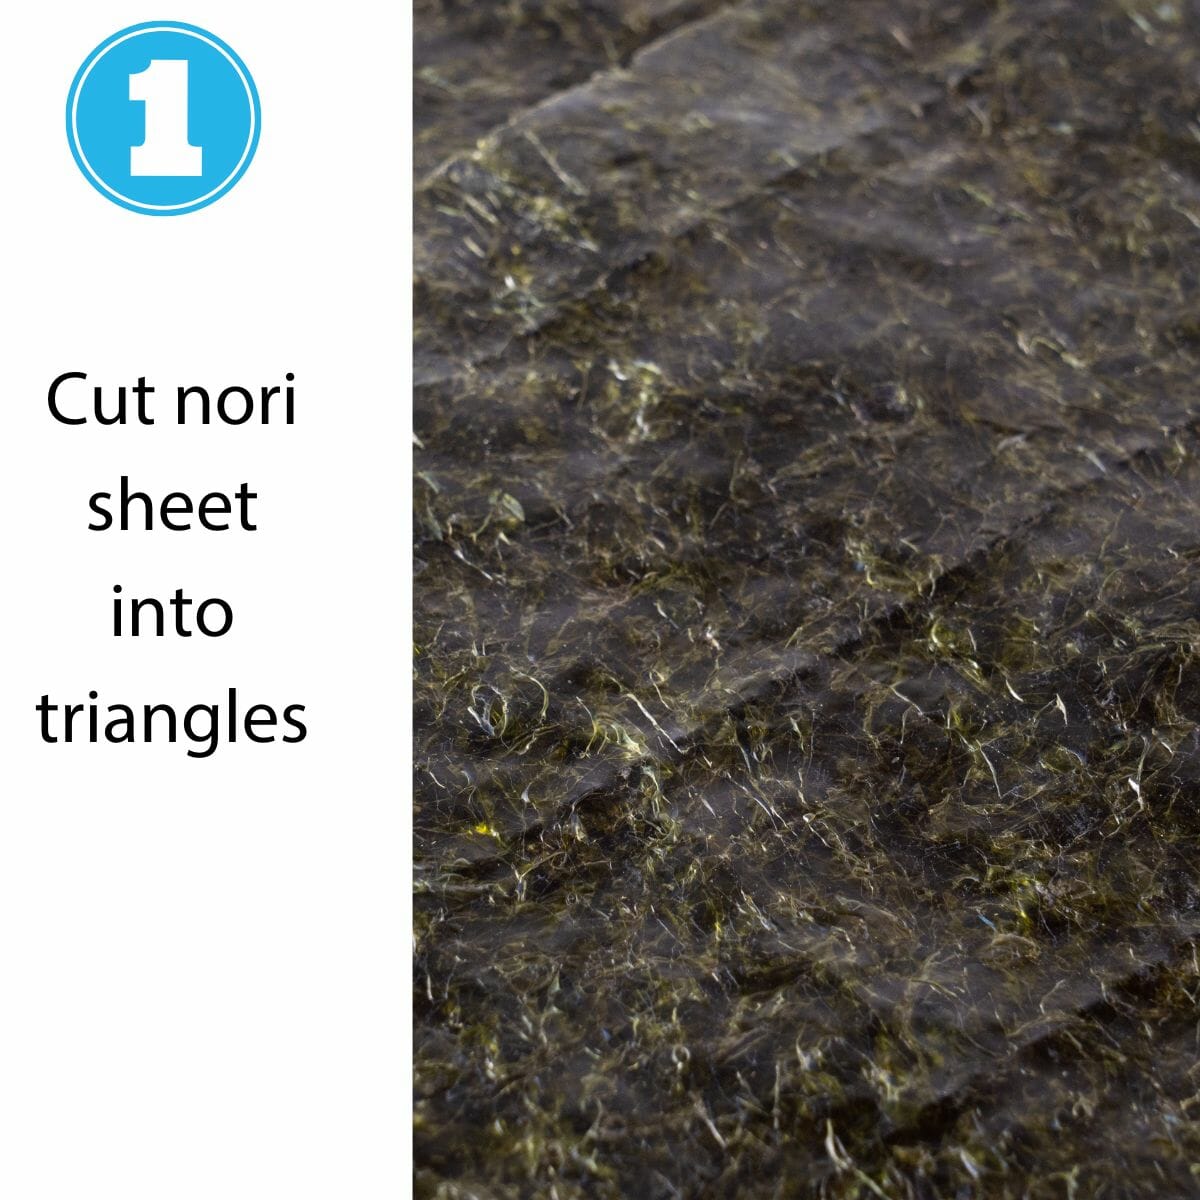
Wrap the Onigiri with Nori Sheets:
Enjoy Immediately Or Keep Refrigerated for 3 Days
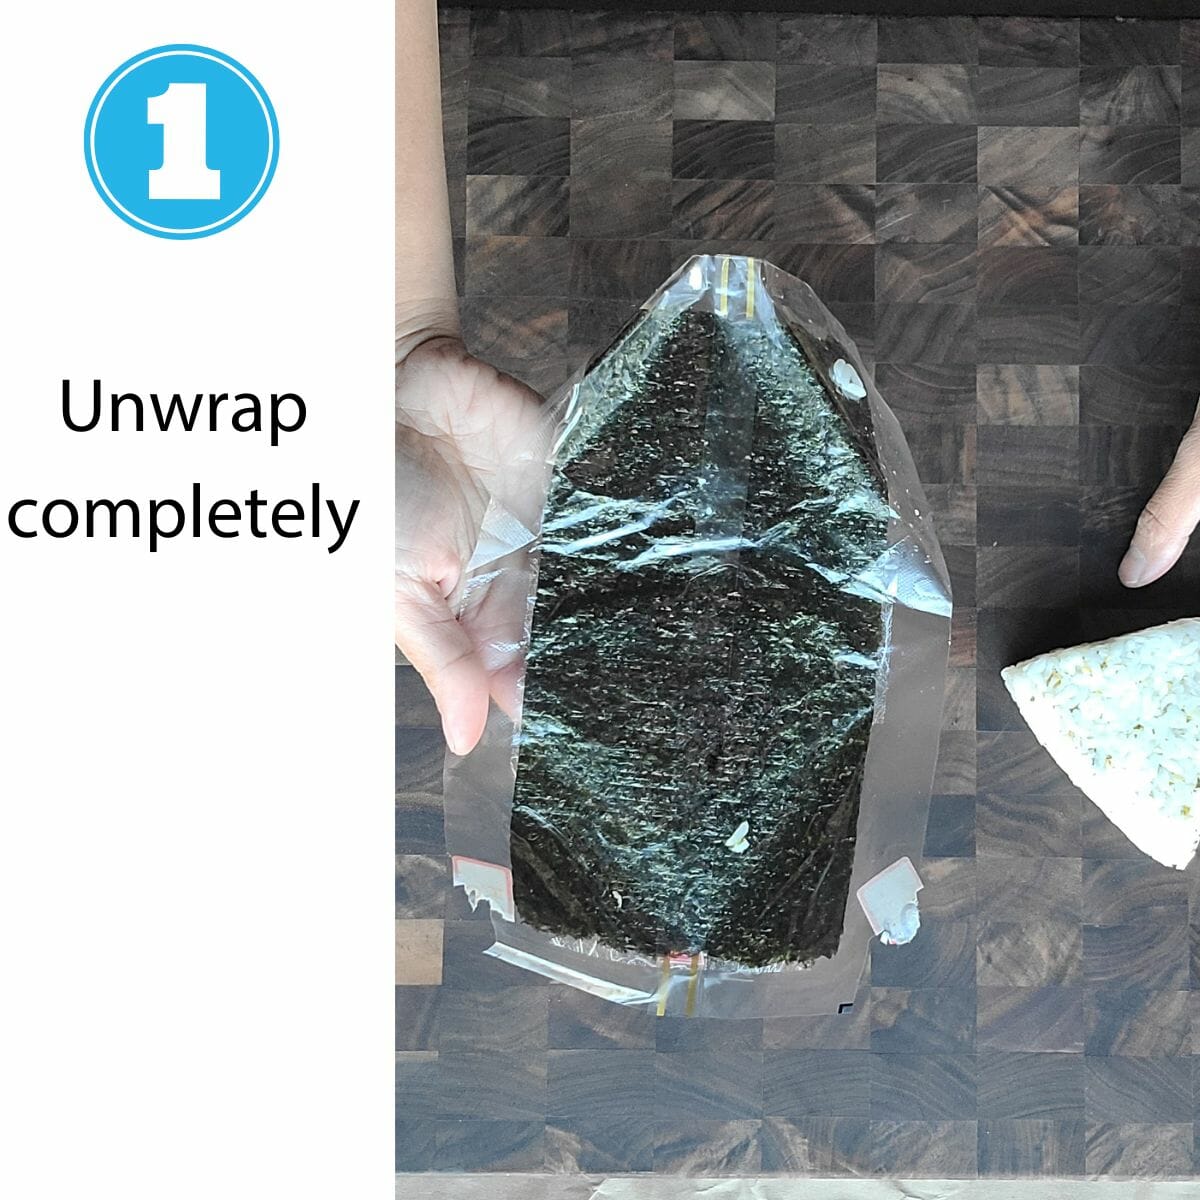
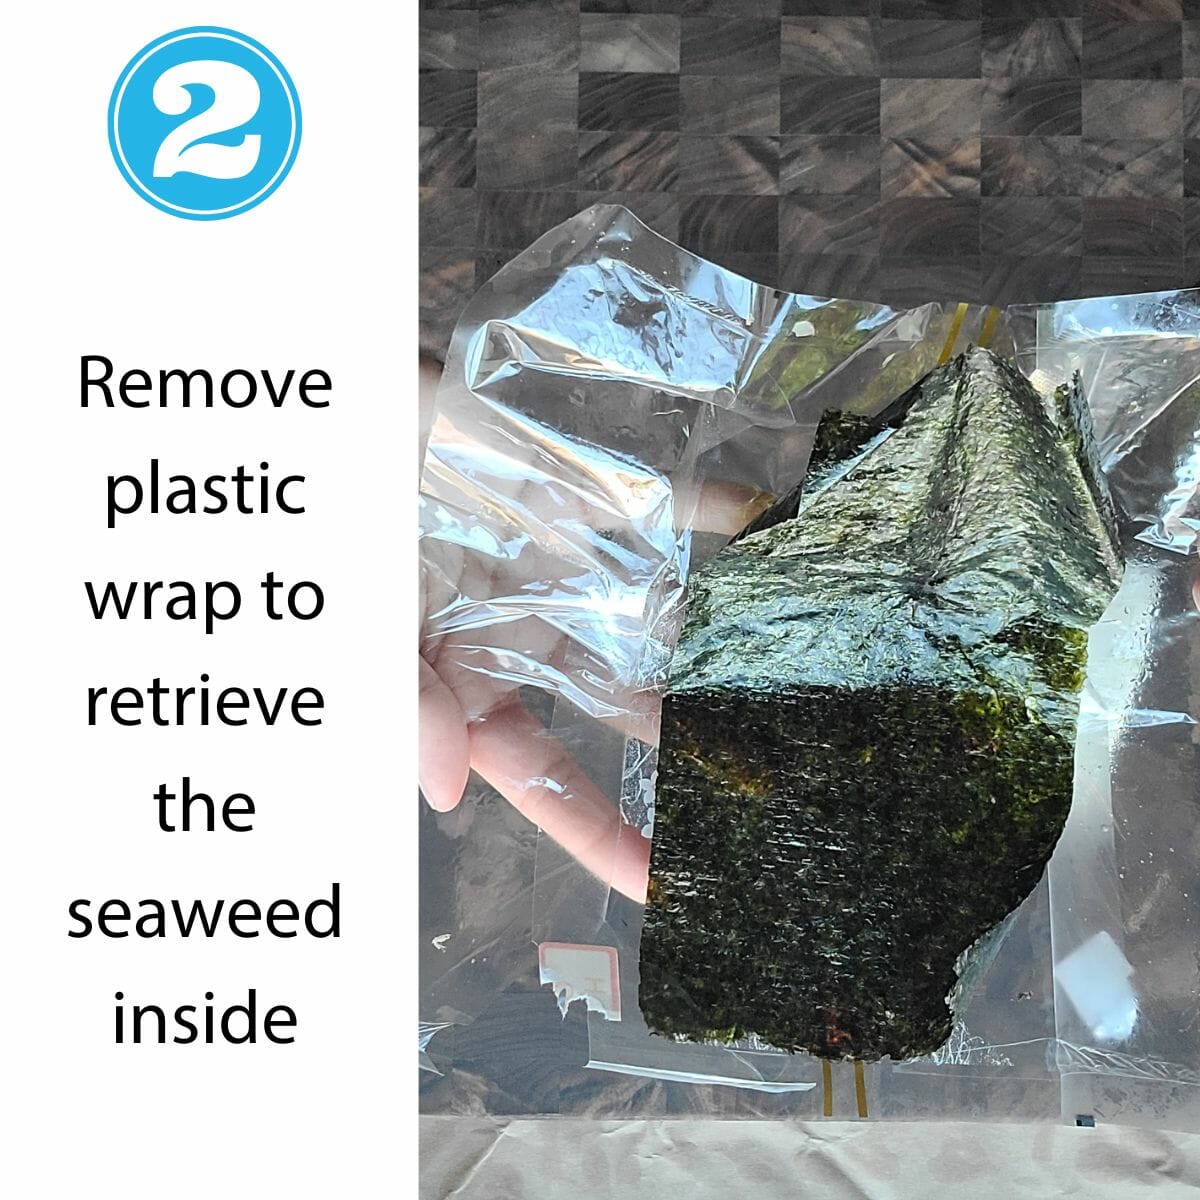
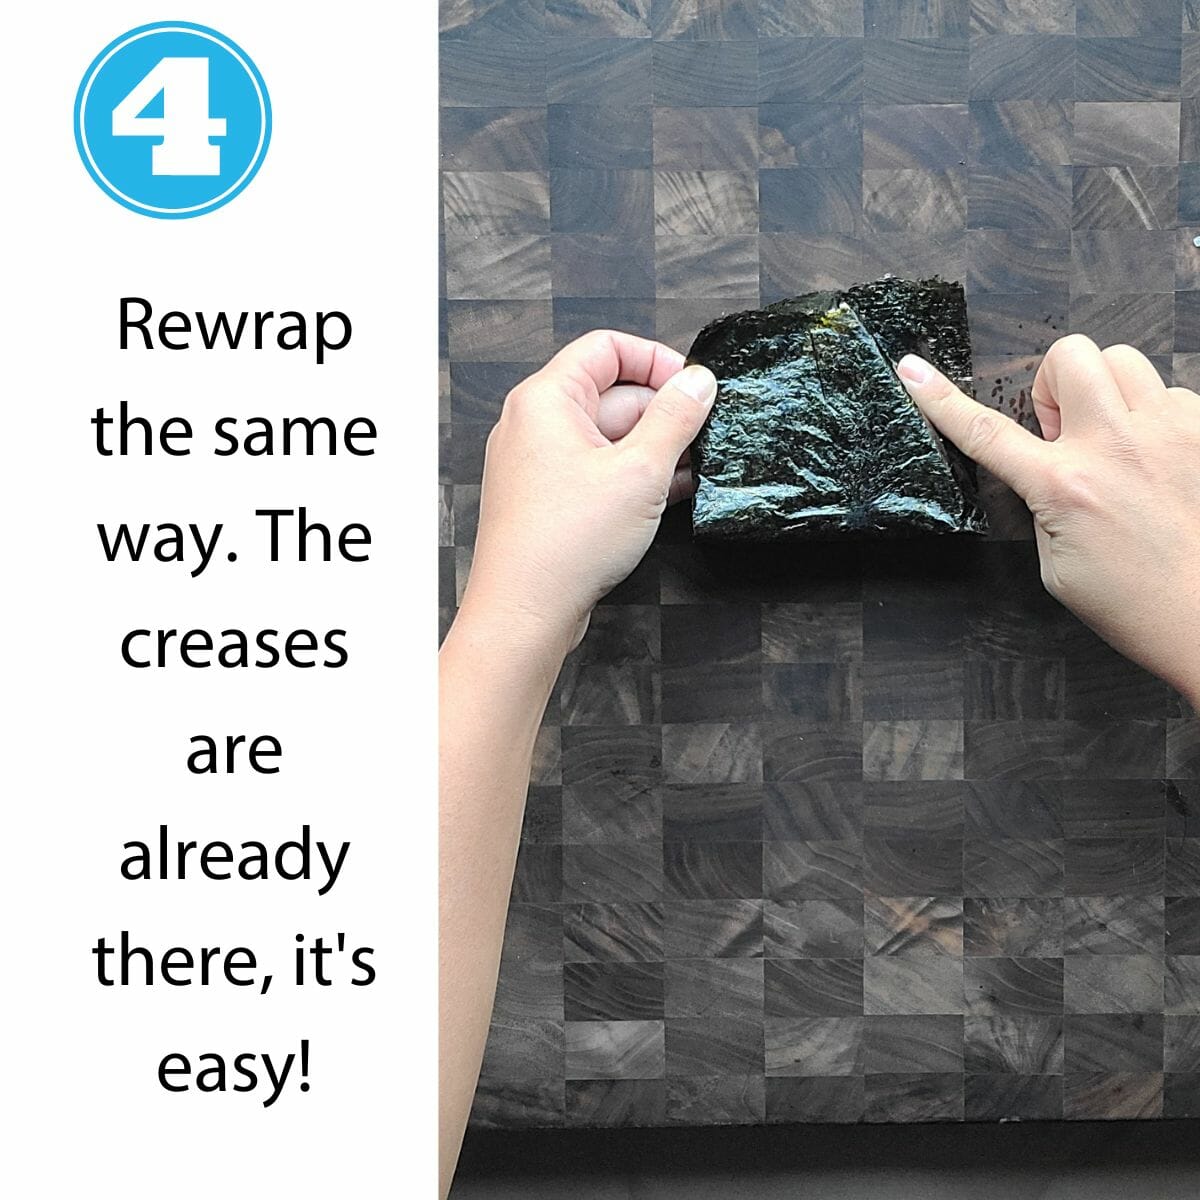
If using onigiri wrapper – to enjoy it, remove plastic protector to retrieve the crispy nori sheet inside. Rewrap the same way – it’s easier the 2nd time around as the creases are already there.
If using nori sheets – enjoy immediately while still hot, or you can eat it cold as well! Wrap individually in clear Saran wrap and keep refrigerated in airtight container or ziplock bag.
Onigiri can be enjoyed hot or cold. If you don’t like cold onigiri you can microwave it for 20 seconds. (Just remember to remove plastic wrapper first if using onigiri wrapper, before putting it in the microwave!)
Onigiri can stay in refrigerator for up to 3 days.
My 10 and 11 year old sons love bringing these to school, and even take some extras to share with friends!
Notes
If you use nori sheets, you might want to consume the onirigi as soon as possible – the nori sheet will get soggy over time as the moisture from the rice softens it.
I highly recommend trying the onigiri wrapper – you can do this ahead of time and enjoy it for days in the fridge. Immediately before enjoying it, just remove the plastic to retrieve the protected nori inside, and re-wrap using same technique. This ensures that you get crispy nori every time!
Wet your hands with cold water when making the onigiri – the rice is hot so this helps, and it also prevent rice from sticking to your hands too much.
Can’t decide which filling? Try them all! The seaweed wrapper can easily be labeled with a sharpie so you know what’s what.
- Prep Time: 5
- Cook Time: 20
- Cuisine: asian

What is your favorite onigiri filling?
Your step 5 is completely wrong. You don’t remove the wrapper from the rice ball. There’s a line straight down the middle of the wrapper, and if you wrapped it correctly, you pull the line, tearing it straight down the middle. You wiggle the plastic wrap off the seaweed one side at a time (the seaweed sheet stays on the rice ball) and refold it down before pulling off the plastic wrap on the other side.